
Making Floor/Wall Textures — by doomjedi
A note on seamless tiling
Wall textures need to be horizontally seamless (tileable). Floor textures need to be seamless both horizontally and vertically. The method for achieving this is the same in both cases. This tutorial focuses on walls.
The quick method
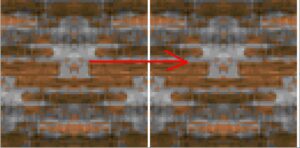
The easiest way to create walls (and even floors) is to flip a 64×32 image horizontally — or a 32×32 image both vertically and horizontally for floors:
MS-Paint → Image → Flip/Rotate
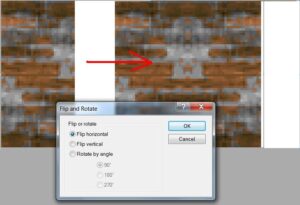
This is fast, but the result tends to look overly repetitive and mirror-symmetrical. It can still work well for textures like grass.
The full method
Step 1 — Find and prepare your image
Find an appropriate image, resize it to 64×64, and convert it to the Wolf3D palette using SpriteMaker.
Step 2 — Open in MS-Paint
Open the converted file in MS-Paint.
Step 3 — Expand the canvas
Double the canvas width, plus one pixel:
Image → Attributes → Width = 129
Step 4 — Copy the image alongside itself
Copy the image and paste it to the right of the original, leaving a single black or white vertical line between the two copies to separate them.
Step 5 — Edit the edges
Edit the left and right edges of the original image so they blend seamlessly with the edges of the copy on the right. Always edit only the original (left) image — never the copy.
Step 6 — Check your work
After each edit, copy the updated original over the copy on the right again, and check whether any further fixes are needed.
Step 7 — Repeat until done
Repeat Steps 5 and 6 until the seam is completely gone and the texture tiles seamlessly.
Step 8 — For floor textures
Repeat Steps 3–7 vertically to make the texture seamless in the vertical direction as well.
Tip
Sometimes it's more convenient to triple the canvas width instead of doubling it, and work on the image in the middle — re-copying it to both the left and right after each round of edits.
To return to the GFX tutorials, click here.