
Episode 1: Castle Wolfenstein
Level 1
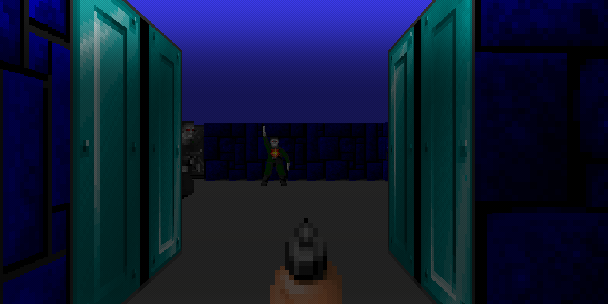
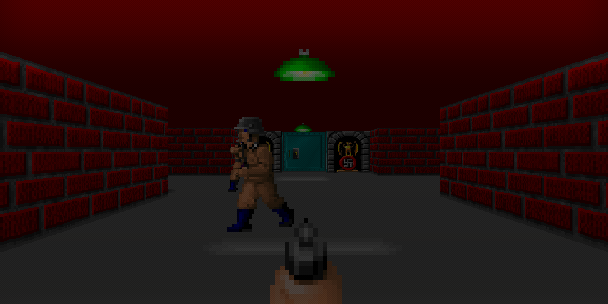
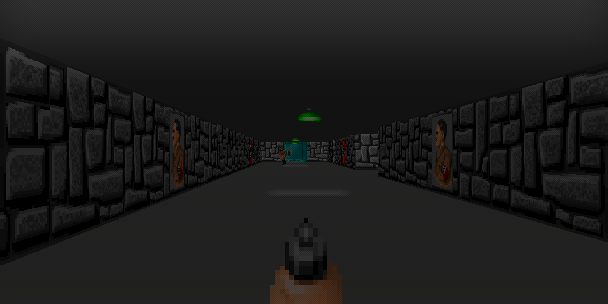 You begin in your prison cell, panting slightly, blood dripping to the point of your knife and making a tiny puddle on the stone floor. There's a larger puddle underneath the body of the prison guard, still warm. He died silently, taken completely by surprise by the attack. His gun has a full chamber of eight bullets. Warily, you creep out of the cell and look left and right. It might just be possible to escape, before they raise the alarm... This is the situation, your situation, when you start playing Wolfenstein 3D, episode 1. This is the introduction level, and as such, does a fairly good job of the basics. We meet the ubiquitous German infantry, their steroid-enhanced canines, and get an introduction to rudimentary secret door finding. In fact the secret elevator to level 10 is on this level, in the very last room.
It all looks very neat, and eerily lifeless. The walls are cold grey stone, or some kind of blue flecked granite. Where are all the prisoners? All you can see are empty cells and skeletons...
Level 2
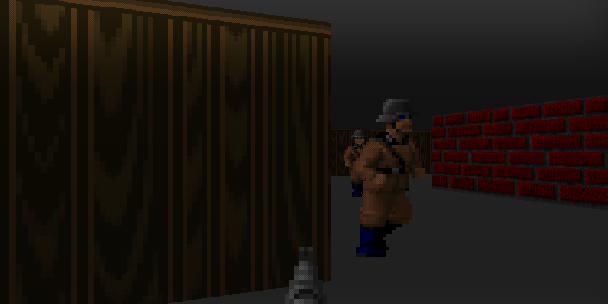
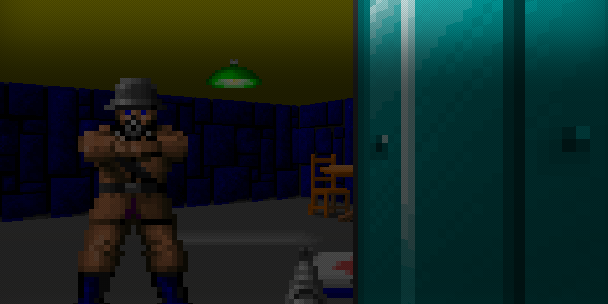
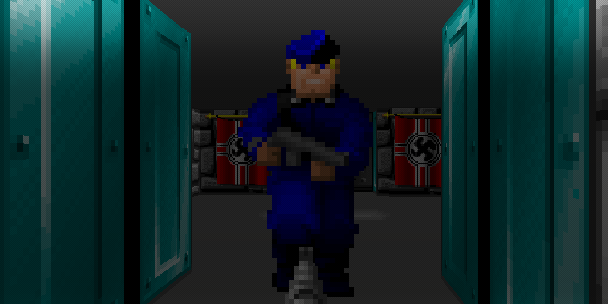
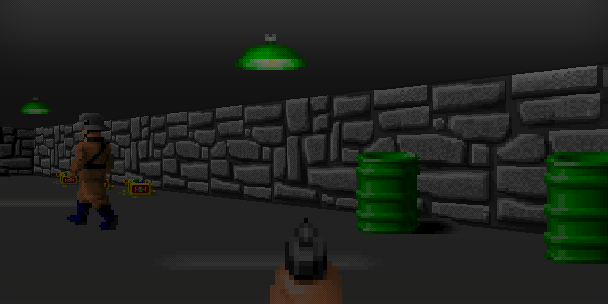
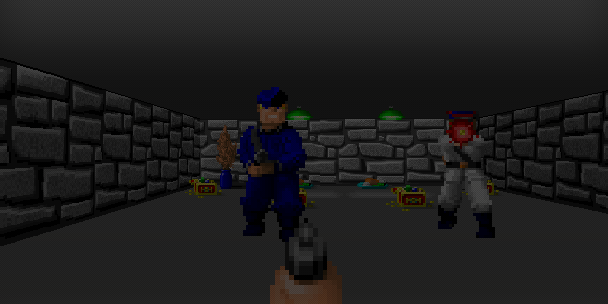
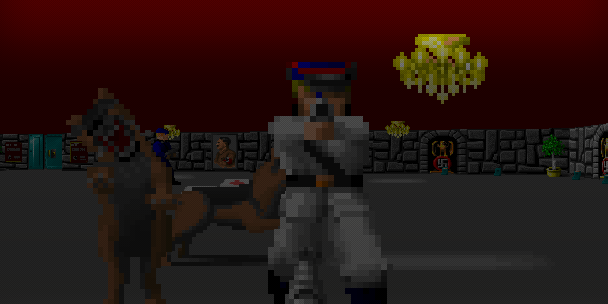
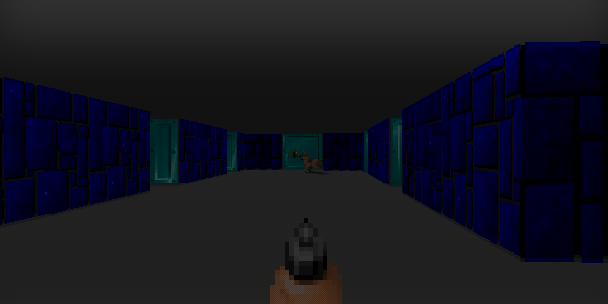 Things get tougher pretty quickly, as you're thrown into one of the more challenging levels of the game. You start out near the dog pound, and soon enough you're greeted with the sight of the unsuspecting back of an infantryman. Stab him quick. Later on you'll find yourself battling through a chilling bluestone prison, huge dining halls, warm kitchens, and even large wood-panelled treasure sheds. All of them, needless to say, guarded. Oh yeah, and you also get your first look at the rock hard SS men in their tight blue uniform. These guys are not a picnic. If you ever let one get close to you and start firing, you will be dead. Most people find this out at the end of the level, in the prison barracks, where you're besieged on all sides by SS, infantry and dogs. It's a real pity you haven't found that Gatling gun yet.
Level 3

To be honest, this is not my favourite Wolfenstein level. (Actually, 59 aren't my favourite Wolfenstein level). There's too much stone everywhere, the design is both circuitous and linear, and the first-episode-obligatory huge ginormous area where you can go and get lost is a bit bland and just not worth the interest. But it is getting harder...
Level 4
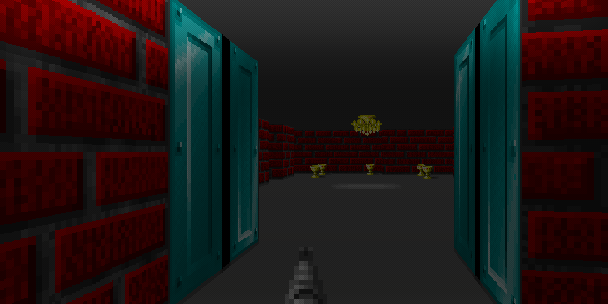
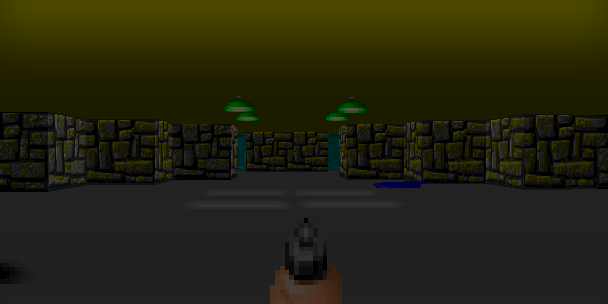
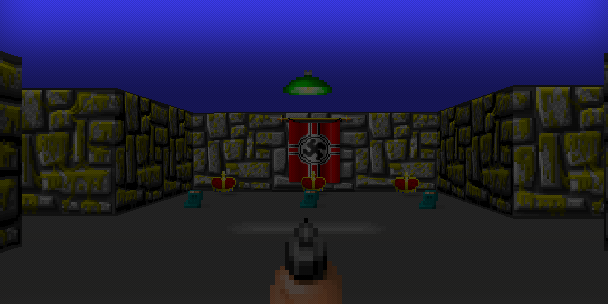
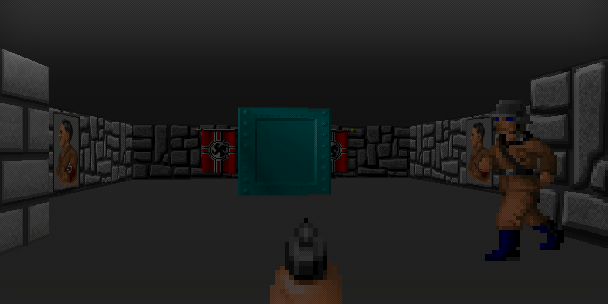
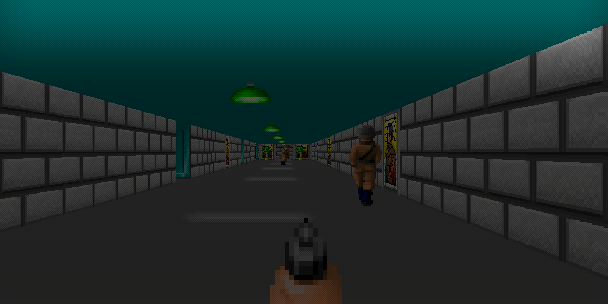
Up till now, it's been a piece of cake. These German guards are hopeless, always caught out with their back turned, and terribly slow to react. Terrible for them, that is. Was the possibility of escape from Wolfenstein so distant that no-one put in any contingency plans? It seems so. Right now, you're entertaining a lot of hope for the future. Mid level, however, everything changes, without much warning. At first, you're running along a blank corridor, towards a deserted alcove, when who should be there but three infantry. You duck back, barely able to avoid the gunfire. They're still stupid enough to come walking around the corner, however, and you pick them off at your leisure. Challenge disposed of easily, open the door beyond. You see a massive hallway stretching out in front. You can't see anyone here, but that might just be because of the lines of stone passages and glowing yellow lamps. Something, some sixth sense, tells you this way is watched.
Standing in the doorway, you shoot a single bullet into the air.
Instantly you hear yells, screams, and then a German infantryman comes into view. One shot takes him down. But two more have appeared, and they've seen you. You fall to the floor, shooting furiously, and silver bullets whizz in the open doorway. One of the guards goes down, a bullet in his thigh, but two more have appeared by now, both shooting right at you. You're realising what a bad position you're in. You can't duck out of sight without crouching up and exposing a larger profile, and lying on the floor like this there's no possibility of running. So you roll along the floor, hearing all around you the whistle and pang of bullets, flying and ricocheting, shooting up small rocky shards in the floor beside you, and the heavy boom of your machine gun as you fire round after round at the Germans.
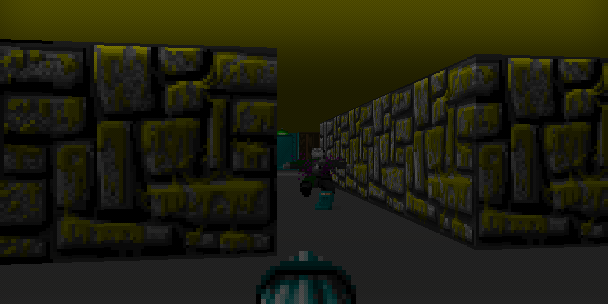
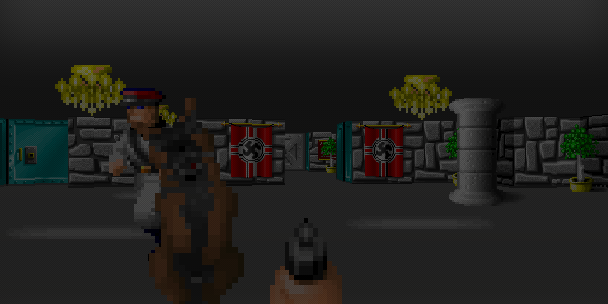
One falls. Two more fall. Then it's silent in here, except for your heavy panting as you lie against the wall, feeling lucky to be alive. It lasts about two seconds, then you hear a door open, somewhere to the left of this hall. It spurs you into action. You start running, sprint pell-mell for the doorway on the far side of this hall. It's a hall shaped like a huge cross. On your right, a door leads to a dank series of rooms built from red brick, and on your left a guard has just emerged from a blue stone prison area. He shouts and shoots a single bullet, but you've already flown past behind a pillar.This doorway on the far side is unknown. With no time for reflection, you haul it open. It shows you a wide passage, running crossways to the hall, and seemingly deserted. It widens at either end, and you decide to head left, shoving new bullets into your gun as you do so. No shouts. But somehow you hear the sound of running feet behind you. You whirl to see two German guards running toward you, wisely keeping their mouths shut. It wasn't wise enough, for now you casually shoot them both, before even a single shot is fired in return.
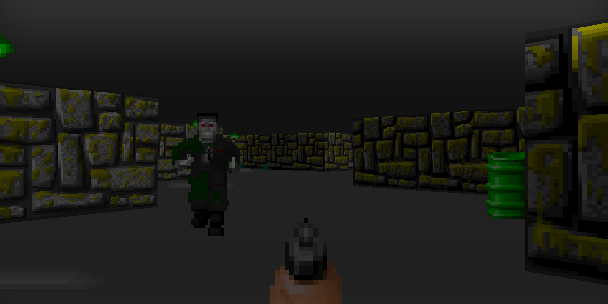
You continue the way you were. Here the passage widens. Wary of an ambush, you come to a stop, then spring forward, gun trained on the left wall. A guard stands there, gun at the ready, a snarl on his face. Your shot came even as the first patch of brown appeared, and it smacks him in the wrist, forcing him to drop his gun. Your momentum carries you forward, and now you're worried about the right alcove. Sure enough, as you hit the earth and roll, a bullet hits the wall above you. You know better than to stop moving, and continue rolling, while more bullets strike the surroundings. You tense your muscles, then in one smooth motion turn your head, raise your gun, letting your circular motion do the work, and fire a single shot into the heart of the huge guard. His face goes purple, his arms stiffen, and he crashes dead to the ground.
You look back at the first guard. He's not dead, not even wounded seriously. In his bloodsoaked right hand, he holds the gun he just managed to pick up from the floor. It's not pointed directly at you, and you have time enough to a fire a short staccato from your gun. The bullets puncture his neck, releasing a torrent of blood which pours down the front of his shirt like a waterwheel. The expression on his face has frozen, and he falls forward to the ground. A messy death. More noise. You look along the passageway, and see a guard emerge from the hallway door. You're sitting up, gun trained and ready, and the guard doesn't know where you are. Perfect kill. You stand up. The joints have come in for a bit of a battering, but you're still untouched. You walk to the doorway and heave it open.
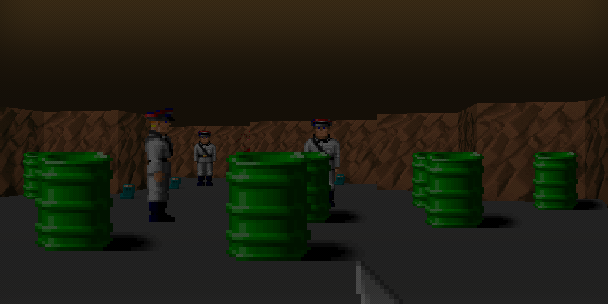
Wow. What a space. You've never seen such a large indoor area - it's like a storage yard. The area straight in front of you, and also to your right, hidden behind the passage wall, is open and bare. Further away, are two squat, heavy structures, ringed by passageways. One is built from grey stone, one from blue. They are markedly different in character to the officers' mess and prison cell areas you've seen so far. And there's infantry here. Everywhere. Three are in your immediate vision, and staring at you. But they don't have their guns trained - if they had you'd be dead now. Instead you whip the machine gun up, fire a wide burst that makes the guards duck instinctively. You sidestep, this time taking care to aim, and shoot the nearest guard in the chest. He doubles over, screaming in agony, but through the squeals you can hear footsteps, multiple footsteps, coming from the hidden area on your right. This is turning out a lot hairier than you were hoping for...
The first return bullet is fired, and you feel something nick your lower leg. Your next shot takes out another infantryman, and now you see four German guards rounding the corner. They've all spotted you, and the guns are coming out. You run. Forward, over the two dead bodies of the guards. Towards the squat, sturdy buildings at the back. Gunshots ring out, and they're closer than ever. Shelter, in the form of a passage round the blue building, is desperately far away, but you keep running. A shot catches you in the left elbow, causing you to scream out in pain, and instantly the sleeve of your shirt is wet. But you keep running, gaining acceleration.
The passage. Quick. You duck around the passage wall, and you're shielded from the infantry. For perhaps seven seconds. Looking at the blue stone building, you suddenly hear a chilling sound from within. "SCHUTZSTAFFEL!!" comes the cry, and the door right in front of you opens wide, revealing an SS guard in full uniform. You're numb with shock, but still you're able to fire a burst of four bullets into the SS, who burbles up blood and falls backward, to reveal a second SS, standing behind him, and drawing his machine gun to fire. And you can hear the sound of a second door from the blue building opening, a door not twenty feet away which will give the third SS a perfect shooting angle. Only one thing you can do. You run forward, aiming your gun for a head shot. No time for gut wounds, you need to get out of gunshot and quickly. The SS guard has just brought its gun to bear as you fire your gun.
His right eye gushes over with blood, and his head whips back. For a moment he seems to hang there, suspended from string, as you run pell-mell for the door and shelter. Then he falls back, allowing you to jump the first body, shoving your way past his still-falling corpse, as bullets from both the third SS and infantry behind you strike the door. This building seems to be a security complex - strong, with a number of pillars provided for sniping. You run around behind one, worrying about the location of that third SS, and there seems to be something on the ground here.
Could it be...
You lift the heavy thing wonderingly, stopping even amidst the battle to admire the deathly design. It has an ammo strap, which you curl around your shoulder, heedless of the running and shouting. The gun feels heavy, hanging horizontal at waist level - a chunky piece of deathware. The Gatling gun. The noise is getting closer than ever, and now you whip around, firing nonstop from the gun, which bucks and churns in your grip... Level 4. It's really rather brilliant, and easily the best of Episode 1. If you've read through all that (God bless you!), you'll have some idea why...
Level 5
The last level saw the enemies get a lot harder, and more numerous. Now, as you slowly fight your way to the exist, they're starting to become a lot smarter as well. Guards no longer run stupidly down the hallway toward you, letting you pick them off at your leisure. Now they have a tendency to hide in alcoves, in the area where a door opens, and blasting your open back as you run through. It doesn't help that Level 5 is yet another larger, torturous exercise that takes you from one side of the map to the other. And it doesn't seem possible at first, but there's fully half of this level that's never been seen by most Wolfenstein players.
You remember the final room, with ten Nazi guards hiding behind pillars and walls? Well, go there, and head to the left wall. Press the second (or third) block. It slides back to reveal a small alcove, and a door. The door leads to a wide passage running straight to the far side of the level, with three doors on its left side. These doors lead to a massive Nazi conglomerate, with eight buildings inside an area the size of a hangar. And, of course, lots of Nazis. Many of these first episode levels take up the full 64 x 64 tile area. Why don't they seem as big as the later levels? Maybe because the passages are just a little bit wider, straighter, and more geometric and thus more easily memorised. Later on things get a lot more organic, closer, more claustrophobic.
For now, there's one thing, and one thing only, lightens your heart. You seem to have left the prison cells and torture rooms far behind. This level feels like an officer area, with tiny dining halls lit by close firelight, stone halls used for training drills, and treasure storehouses galore. You've already seen what seems like one of the largest collection of sacked French, Polish and even Russian treasure in the whole of Germany.
Level 6
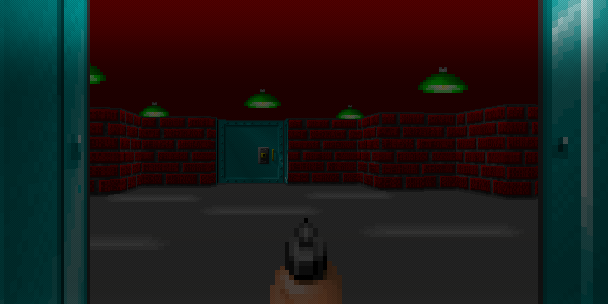
And on you run, to one of the loneliest and most terrifying area levels yet. Early on, after disposing of the two guards in a small entrance room, you'll find yourself in the middle of a long corridor, wide and tiled with red brick walls, that seems to run forever in either direction. It's the central theme for the level - a lot of long red brick corridors, with a lot of running down them, and alert infantry in sniping positions at the end. Inexplicably, the key for this level isn't guarded by a ring of five SS with stern expressions, but by five Rottweilers! The Gatling gun doesn't have too much trouble with them.
Level 7
Along with level 4, the second major highlight of Episode 1 and a triumph of nonlinearity. Remember that level in Doom, E1M7, that multidimensional horror known as the Computer Station? Level 7 is a bit like that, only even more twisty and multiply connected, a maze of twisting wood corridors that somehow never feels like a maze. And just like E1M7, there are baddies everywhere. Hundreds of them (well, almost). And all infantry, except for a couple of SS guarding the key. The only real hint I can give for this level is don't go straight ahead. You'll find yourself in a long hall, with pillars stretching away on either side, and there's a soldier behind each of them. You'll be dead before you make the other side. Avoid that, and just try to work out the level layout yourself. I've been playing it for five years, and I still get lost.
Level 8
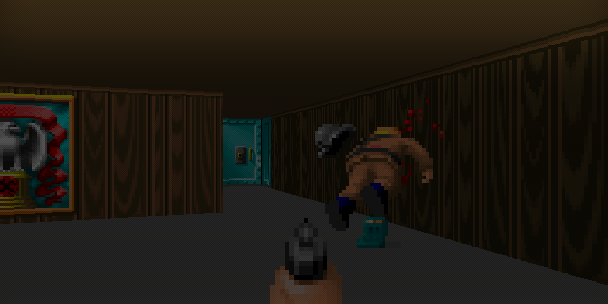
The penultimate episode of Episode 1, and it's not that bad at all. The progression in this level is perfectly judged, guiding the player down the correct path while appearing to give him full and absolute control of the path. I particularly like the trick of illustrating the correct way via pools of blood. There are plenty of opportunities to catch an unaware Nazi from behind, secret doors just where you would expect them to be, and the hard-to-understand (but always welcomed) tendency for Nazi soldiers to line up at attention in straight lines, giving the Gatling gun a chance to show its stuff.
You start to get a little hopeful. These guards seem hopelessly uninformed. Looks like you killed the guys upstairs before they had a chance to put out the alarm. Maybe you'll get out of this after all...
Level 9
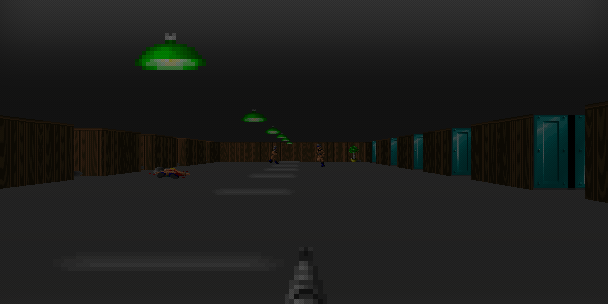
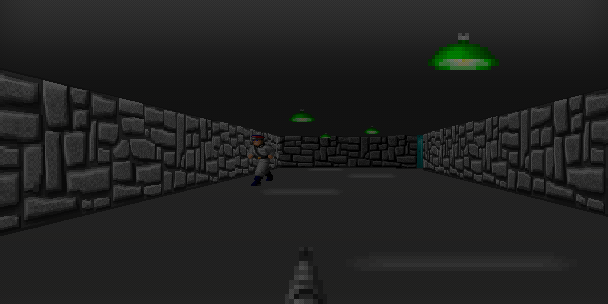
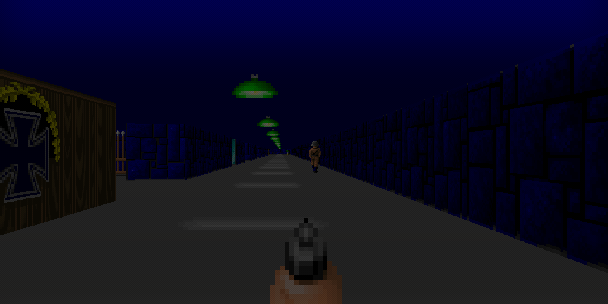
This all looks pretty good. Nice, quiet hangar, lines of lamps giving good illumination, cheery marching music in the background, the faint whiff of outside air. If your memory is correct, this is at ground level.
Hmmm... door over here. Maybe it leads out. You may as well try it. And out comes the mighty Hans Grosse, your typical blond Aryan superman, armed with two chainguns and a nice line in movie-style witty one-liners ("Good morning!" Good morning? Why isn't he saying something like Die, Allied Bastard!). Once you've gotten over your shock, however, Hans is pretty easy to defeat. Just run back as far as you can, and shoot. His bullets get less effective, but yours are as deadly as ever. (If you have trouble, you can always try the secret doorway that surely every Wolfenstein player in the world knows about. Left wall, the golden emblem in the middle.) Soon he falls backward spewing blood. Leaving you to run past his ichor-stained body, rummage around in there for the gold key (ewwwww), and open the final door to freedom. You see what looks like an empty garage, opening on fair green fields under a bright blue sky. There's really nothing else to do - you run for the exit and leap into the air, screaming joyfully.
Level 10
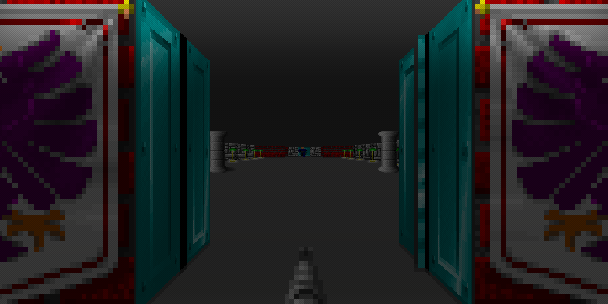
Found the secret level, eh? Well, you're probably hoping for something different. And thankfully, Wolfenstein doesn't disappoint. The Germans, fresh from the sacking of Europe, had quite a lot of loot on their hands. Where to put it all? The gold bars and easily convertible monetary goods could be sent to the neutral Swiss, but that still left a lot of family heirlooms, priceless religious artefacts and Royal treasures. The solution, simple really, was storage in army barracks. Secrecy was necessary, as there were always lightfingered infantry about. Some treasures, the less important ones, would be left about in the main areas, mainly to stop suspicious thoughts in the soldiers. But the real stuff, at least in Castle Wolfenstein, was hidden in a dungeon deep underground, well away from prying eyes. It wasn't left to sit there alone - many guards, mainly the SS, who could be trusted to keep a secret, were appointed to this secret level, and kept separate from the main duties of the Castle.
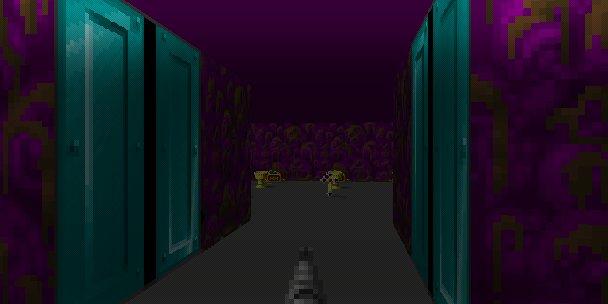
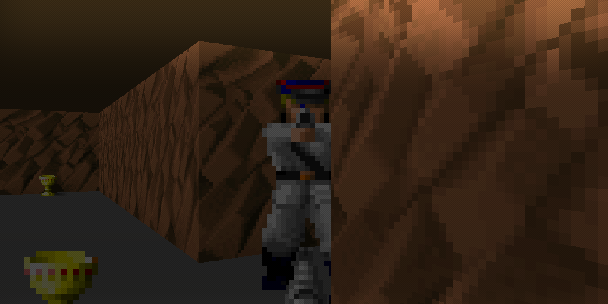
The elevator you ride down is little used, and a little rusty. The creak of the cage is alarming, almost as alarming as how far it's descending. Finally it judders still, in a place that smells wet and old, and you open the door. This is underground, all right. The walls aren't brick, aren't stone, aren't wood. They're ... it's hard to be sure. Some kind of rotted vegetable matter? It's purple, and has thick wooden vines writhing over it. You reach out and touch a vine, and find it to be strong, slightly yielding, drawing water from some underground aquifer. And from there, you go on a killing spree, and find that this level is not a pushover. In all, it's the hardest level in the first episode. Remember the end of the level, where there's four SS waiting in ambush by the exit, and a fake exit that leads to a room with nine (or so it seems) SS inside? This level takes you through just about every shareware texture, leads you on some wildly circuitous and misleading passages, and rewards you with more treasure and extra life globes than you've ever laid your greedy eyes on. I don't think Romero completed this level in his 5:41 Episode 1 time...
Episode 2: Operation Eisenfaust
Level 1
Silence. Eerie silence, and not a soul around. You were expecting guard dogs, police, infantry, all sorts of security, placed at the entrance trying to keep you out. Especially after your legendary escape from Castle Wolfenstein. But nothing. It's the dead of night, and Castle Hollehammer is still. It's really quiet in here. And damp. These walls, which were once grey stone, are now covered over with yellowing lichen, dripping wet and smelling slightly. There are pools of water, and blood, on the floor. And worse... Surrounded by small rooms, laid out haphazardly in the open factory floor, you decide to have a look around. Big mistake. Moments later, you're dead. You've just met one of the mutants. These guys, if it is possible, are even harder than the SS. Whereas the SS at least take some time to fire, these grey faced monstrosities fire at you constantly with the chain gun in their chest. And if you get close enough for them to hack at you with their cleavers, you're as good as dead. But revenge is sweet. And soon after, you'll hear the gurgling scream as your first mutant goes down in a spray of purple blood. All right... Oh yeah, and this level also has the secret level entrance in it. How do you get there? Well, from the starting point, you take a left turn, kill the mutants when you find them in that square room with the food and treasure, and there'll be a secret passage on the right hand wall. It goes to a small room full of ammo and first aid. Search around for the second secret door, and this one leads to the elevator. Try it. You might be surprised.
Level 2
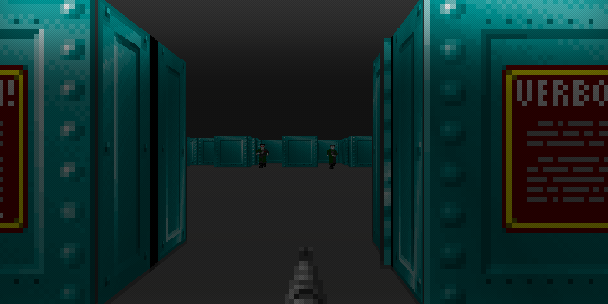
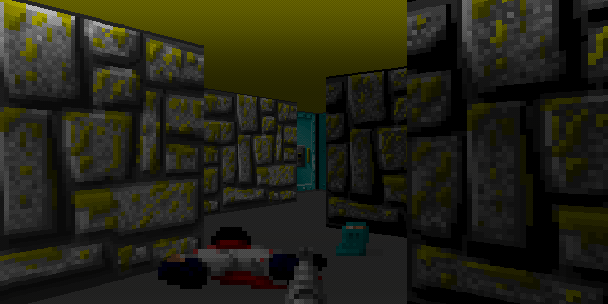
Or you might throw your hands up in disgust, stop trying, take the normal exit, and wind up here. It starts out much the same way, in a desolate maze of decaying yellow stone. By crikey, you'll be thinking, these mutants are hard to kill. You've got to be quick with your aim, as they'll take advantage of the tiniest opportunity to pellet you with lead. Not only that, these mutants know how to ambush. Save, and save often. But eventually you come to a tiny room with two VERBOTEN signs, and a door flanked either side by polished wood. And beyond, you find a room. Just that. A room, with grey floor and roof, wooden walls, and lines of pillars on the left and right. Dead end. Well, no. Actually there's a secret door here, which will let you out of the mutant pen and into the officer area. Fortunately it's very obvious. I don't think id fooled anybody here. So you push it back, and end up in a series of clean, well-decorated passages, in red brick and wood. And you pass through these, killing the guards and getting the keys, and into a large blue stone courtyard, ringed on all sides by thin tunnels swarming with SS and infantry. You're constantly assaulted by images of low barred cells, some empty, some with long-dead skeletons, still clinging hopelessly to the bars. Strange. The imagery as a whole isn't very overt here, but this level is unsettling in a way that many of the later bloodbaths aren't. No doubt unintentionally, there is something about this level that calls to mind images of concentration camps. When you do get to the elevator, it's a bit of a relief.
Level 3

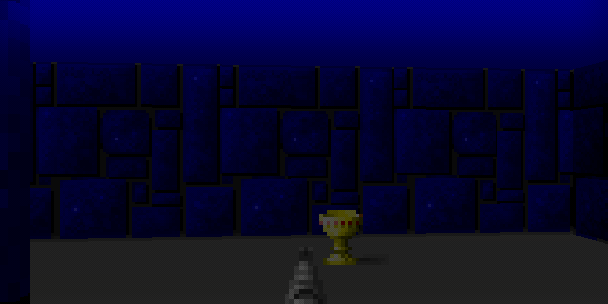
It starts out like a view from Episode 1, but almost straightaway you're back in the land of decaying yellow stone, in passages that are deceptively wide and straightforward. In fact, you'll probably spend a good deal of time just sorting out where the hell you are. Plus, every now and then, you get a glimpse of the night sky behind a stone pillar. Those simple black background images evoke strange feelings... knowing it's night out there somehow just evokes feelings of claustrophobia and loneliness. Wolfenstein at its best. Don't worry, there are plenty of guards and SS around to make you feel wanted. But no mutants. Where are they? Again, don't worry, you'll find them. I won't spoil the surprise by telling you how. Just get ready to run.
Level 4
You start at the end of a long passage, with mutants running straight for you. There are large open spaces on your left and right, also full of mutants. Each space is a quadrangle, flanked on two sides by doors in groups of three. Some are just dead ends, some go a little way before petering out, some lead to all new spaces, keys, and enemies. Of course - lots of enemies. And that's just the start. Rather than anally take you through the whole level, I might as well share something that happened on this level, something that had me marvelling at the sheer gall of these id programmers. There's this section early on in the level when, running pell-mell through a maze of decayed stone passages, you come to a door flanked by clean grey stone. Behind the door is a large quadrangle, its left and right walls dotted with doors. Up in front is a single soldier, and behind him a silver key. So, naturally, I shot the soldier, and ran for the key. As I took it, the screen began to flash red, and I realised I'd made a mistake. A big mistake.
Mutants were concealed behind each and every single door and now, alerted by my shot, they were pouring out and laying into my frail form. I was half dead before I could even react. Thankfully I had the Gatling, and a host of ammo - running into a corner and spraying left and right, I was able to fell each and every mutant. But the cost was high - I had only nine percent health. When you get in a spot like this, the first instinct is to look for health. So I crossed back and forth, searching behind each and every door. No luck. But suddenly I heard this strange slurping sound, and my health went up one percent. I stopped. Turned around. There was nothing there. But two seconds before, at that point on the floor had been a bright red pool of blood. First I thought it was a bug. It had to be. But it isn't. When your health drops down low enough B.J. will actually drink from pools of blood to replenish himself. I couldn't believe it. But that's just the kind of game Wolfenstein is: violent and revolutionary. Name a single first person shooter that's ever been more confronting.
Level 5
The first thing to come to your attention will probably be the ceiling. It's a rich, bright blue, a perfect wakeup after the soporific night of the last four levels. And you're in for a treat too - tons and tons of enemies, arranged in difficult and intriguing formations, amidst rooms varied and exciting. In a phrase: premier gameplay. The level rundown is as follows. You start out in a long wide passage of decaying yellow stone, with doors all along the left wall. This passage eventually turns left, before coming to a small room with doors on all sides. One of these doors, naturally, is locked. Left takes you into a long wide passage, turning right, of blue stone. Right is a long wide passage, turning right, of red brick. And each is lined, along one side, with doors leading to prison cells, mess halls, kitchens, ammo stores, even long-disused torture chambers. Each room is stuffed to the gills with enemies: SS, guards, even mutants. Which makes for an interesting atmosphere. At first, it feels like a jail block converted into an infantry training area. But the mutants don't really fit this image, and in the end it doesn't matter. It's just a great level chocked to the brim with action. Only at the end, however, does the real rationale become apparent. Once you've found a certain key, you can open that locked door. Which leads you to a wide, long passage of wood panelling, turning right. And you realise that seen from above, this level would look just like a giant swastika. And it does: load up Mapedit and find out.
Level 6
Episode 2 is rapidly picking up pace. Now you find yourself in a long-neglected area, where the ceiling is puce green and the walls covered in purple vines. And before you're even ready, mutants are piling around the corner and laying into you, while infantry sneak up on you from behind. Welcome to level 6. If it reminds you of the Episode 1 secret level, then that's no accident: not only does it use those organic purple walls, but the hallways and passages curve and meander in much the same fashion. And it's a lot harder - this is one maze you'll have trouble keeping fighting through. I mean it. Five minutes, ten, fifteen... you can get lost in here and never get out. But, as is so often the case, you open a door and suddenly Wolfenstein has taken you to another world. Specifically, a region of bluestone holding those ever-alert German infantry. Alert is the word - these guys have an irritating habit of following the gunshots, tracking you down no matter how many doors separate you. Soon, you'll encounter your first firefight where each baddie is involved - a huge room containing infantry, SS, and mutants. Or, you may have found it earlier in that purple maze. Naturally they work together perfectly, focusing their powers on your unprotected body. The experiment of Dr. Schabbs is working to grisly perfection.
Level 7
After all that yellow and purple, it's almost a shock to be once more surrounded by thick, uncompromising grey stone, in a narrow passageway whose walls seem to loom above you. This level, for some strange reason, is almost ridiculously easy to complete. The narrow passage brings you to a junction - one door straight ahead, two on either side. The one on the left is blocked. Turn right, and you find a small irregularly-shaped room with two infantry, and a silver key. After killing them and taking the key, head back and take the locked door. Kill the two SS, open the elevator door, and pull the lever. Simple. It can be done in less than ten seconds. What's behind the last door? Try it. It leads to a small nondescript room, ammo littered on the floor, and three guards. You can kill them if you want, but that's it. What the hell is this level for? Some clue may be found in the elevator room. If you head into the left alcove and press the eagle, a secret passage slides back. Behind is a passage, that turns right and runs some way before coming to a dining room full of SS and infantry. Plus a door, set in walls of decayed yellow stone. Now you're really fighting. An area of unimaginable proportions is spread out before you, containing passages, doors, trees, treasure, and enemies. Tons of treasure. Whole rooms packed full of those valuable red crowns. One particularly memorable room holds an array of soldiers, hanging by their hands from the ceiling, wasted away to skeletons but still in their green army fatigues. The secret area is so large, it makes the main section of the level seem like an afterthought. Put it another way - this is the main section.
Level 8

I'm not going to talk too much about the actual level here. After all, you can't come up with something new SIXTY TIMES OVER, can you? Besides, there's a far more interesting story behind this level, as anyone with Mapedit knows. You might, once upon a merry time, recall having activated the cheat codes. One of them, TAB-T, brought up this white square listing all of the sprites and wall textures in the game. Interesting, but fairly pointless. Except, a little way into the sprite section, you saw this altogether unfamiliar and slightly strange sprite. In yellow writing, like the writing on the Wolfenstein credits screen, overlaid on a red triangle, were the words "RING APOGEE SAY AARDWOLF." What the hell, you wondered, was that? The answer is in here, level 8. Hidden in this level, as a direct challenge to you, the player, is the sprite itself, with its cryptic instructions. And it's not easy to get to. In comparison to some, level 8 is fairly small. The reason for this is that fully one third of the level is taken up by secret door after secret door, in a grid of one unit wide blocks, a fullblown matrix of secret doors 32 X 12 (or thereabouts). That's over a hundred secret doors. Getting to the sprite involves pressing a nondescript wall in a nondescript part of the level proper, heading into the newly created alcove and finding the next secret wall, and continuing for what seems like ad infinitum. The player is wound a torturous path heading left, right, up, down, all the way through the secret door matrix. Some regions have two secret exits, and a single misstep can cut you off from the prize forever.
After maybe ten minutes of button pushing, you find yourself at the end. There are three possibilities here, all of them equally probable. 1, you find an extra life. It seems like an anticlimax. 2, you find Hans Grosse. What a reward. 3, you find this strange sprite telling you to ring apogee and say "aardwolf". Whereupon if you did so, you'd get a prize. After all that effort, it seems a perfect reward. But there was a little problem with this competition, conceived by who knows who. Probably someone at Apogee, wishing to capitalise on the surprise success of Wolfenstein. Problem number one was that within days of Wolfenstein's commercial release, people were reverse-engineering the level code and writing editors. Others were writing graphics utilities. Soon someone noticed the incongruous sprite when it was introduced in v1.1, and then the cat was out of the bag. That was bad enough for id and Apogee, but they were slightly more culpable for the second oversight - providing a cheat that let you see the offending sprite without any effort on your part at all. Whoops, everyone was saying in a very short time. So, kids, don't ring Apogee and say "Aardwolf." You won't win anything. I don't think there's anybody who did...
Level 9
I nominate this guy as the creepiest, most chilling of Wolfenstein's enemies. Worse than the mutants. Worse than those floating Pac-men with the rotating eyes. There's just something about Dr Shabbs' blood-spattered white coat which inspires fear and loathing. And how does he attack you, this fat menace with the white moustache? Shoulder-mounted rocket launcher? Twin uzis? A grenade nest? No, he hurls syringes at you. Er, yeah. Taking a closer look at the syringes, there's a red stain at the end. Could it be the lovely Schabbs is trying to turn you into a mutant? Judging by the way he aims for your eyes, I think not. Eventually he falls back, blood running all over his nice white coat. And the second Nazi menace hits the ground...Let's watch that again...
Level 10
Another confusing, illogical secret level. Would we have it any other way? You can finish this level in about ten seconds, that is if the hairy mutants waiting around the corner don't finish you in two. But where, I say, is the fun in that? This is, after all, a fun if confusing level - with its calm blue ceiling, blue walls and exclusive population of mutants, it might have been a playground/assault course for Dr Shabbs' undead army. And for some reason there's a lot of treasure, hidden up here. Well, the mutants make pretty good guard dogs... It's like this. The core of the level is a rectangular room, with doors at each corner leading to a small room. One of these doors leads to the exit, the others to rooms so nondescript it's not worth the bother. There are, however, a lot of mutants, always hanging in groups and with a nasty habit of catching you unawares. Where's the treasure, you ask? Behind secret doors. In the centre of each wall of this central room, in a minor alcove, is a secret door. And together, they lead to a hell of a lot of treasure. The best secret door to take from this point of view is the one on your left at the start of the level. It leads to a few mutants, true, but also to more treasure than you could stuff in an attic. Whole hallways, hangers, twisty passages await your entrance, stuffed to the brim with treasure. And just when you think you've seen them all, there are more secret doors to be found in the final rooms, leading to - yes, more treasure. Grab your bonanza while you can. You're going after Hitler next, and the whole war effort is even now drawing to a close.
Episode 3: Die, Führer, Die!
Level 1
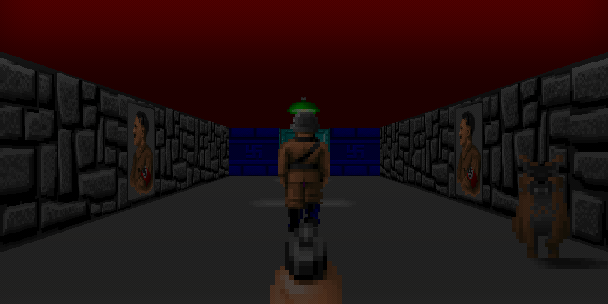
A placid introduction to an episode with a heart of black. Just kidding. In fact, after making it through the last episode intact, you'll probably find episode 3 easier. Then again, you might not. Here you are, at the entrance to the Reichstag, where Hitler has escaped, still behind the reach of Allied Forces. Everything should go along fine, until you reach the final door. There we meet the next enemy you'll have to fight past - the white secret service men. They run around a lot, causing you to waste a lot of bullets, and shoot like a more accurate infantryman. And they're a lot more alert. Nevertheless, you shouldn't have much trouble......yet.
Level 2

Grey stone everywhere. These Germans sure know how to build a sturdy castle. Well, it's the second level of Episode 3, and the difficulty is still fairly average. The hardest part, really, is working out what to do. You can head left, to the wide passage, and try all the doors. Or you can go right, and come to a hallway that splits in two and curves around, joining together again in a packed room of treasure, guards, and the odd key or two. This key, naturally, opens a locked door near your starting point. And that locked door leads on, without any fuss, to the elevator. Short and simple. Getting Hitler might not be so tough, after all. It's certainly easier than Episode 2.
Level 3

Small level. If you know what you're doing, you can finish it in under thirty seconds. Specifically, take the right door to start with. After a bit of death, you come to a room where skeleton cages hang from the ceiling. Strange place for a gold key, but there it is. Run back, and take the middle door. Head straight forward, then turn right and open the locked door. Shoot the SS guy, open the next door, and there's the elevator. Simple. All that mazy stuff with the blue stone passages and floor lamps can be safely ignored.
Level 4
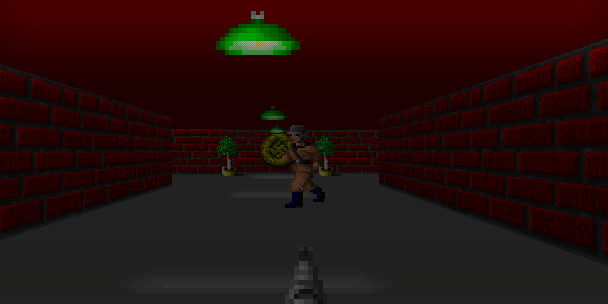
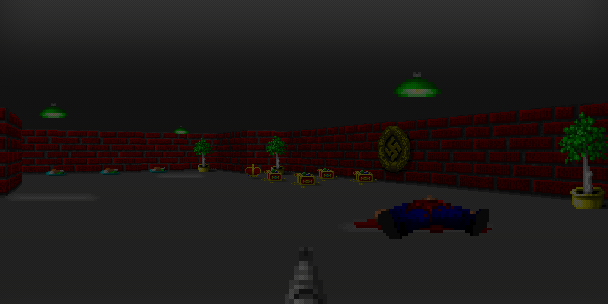
Now this is getting ridiculous. Another short level with hardly any SS in it. When is the game going to get harder? A long level description is not, really, in order. Rest assured it's another grey stone melange, with green lights suspended from the ceiling, plants in the corners, and a few guards here and there. There's something about the narrowness of the passages that is occasionally aesthetically pleasing - not much, though.
Level 5
You start in the midst of some more grey stone walls. Don't head right. Take the left passage. Here, in the chandelier room, you get a couple of enemies to kill. Easy. One door leads to a slow, winding passage that ends up in a room full of ammo, stormtroopers and white officers. No key. So head back and take the right door (ie the correct one). Now things start to hot up slightly. You're in a passage that completely encloses a squat red bunker. Along this passage march Nazi guards, their eyes alert for any intrusion. Like you. Shoot em, then run inside the bunker. You find yourself in a bare room, doorways and passages leading off in all directions. Some lead to small, dank rooms where the floor is stained red, others to potplants and relaxing guards. Soon they're relaxing terminally. Somewhere, in this maze of rooms that isn't a maze, you'll find a gold key. So it's back to the start, and sure enough the elevator is behind the locked doors. Slowly, the episode is building tension. But not fast enough.
Level 6
That all changes - very quickly. Some stats might illustrate this. For example, the number of actors (enemies) in a level. The most populated level in Episode 1 is E1M6, with 109 guards. To contrast, the first five levels in Episode 3 have contained, respectively: 25, 45, 31, 34 and 44. Not much action. (What's the level with the most actors? E4M8, with 145.) But the actor count in this level is eighty - a big jump. But stats don't tell the whole story. And so a level description is in order, I think. You start in a small red brick room. There's a door ahead, and two on either side. One of these is locked - aha, you think. I'll be back here when I've gotten a key. You take the front door. It leads to a curving, U-shaped passage. Around this passage is an even wider bluestone passage, containing a number of white officers. They snipe at you through gaps in the wall, hiding behind pillars. Time to run: you head right, open a door, kill a few guards, and open the next door. A narrow passage, wrought in steel plates, presents itself. Curving left, it soon splits in two. Then does so again, curving and twisting like a demented snake. Soon you encounter guards in this monotonous maze, and the sound of your pistol brings more running. You just keep running, scraping along the walls, picking up scraps of treasure, just waiting and hoping for some kind of exit. It takes a while - this is a bloody big maze, seen from above. Fortunately it's not a complicated maze (just convoluted), and with some intelligence you should reach your goal. It's just this - a small steel plate room, some angry guards, and a gold key. No exit - you'll have take the maze, again. Oh well, at least you got an extra life for your troubles.
You run back patiently, following the corpses, and eventually you'll make it out. Relieved, you run back to the start and try that locked door. It opens on a red brick passage that leads to a wide room, lots of treasure, an extra life, but no exits. It takes a while for this to sink in, but finally it does: you don't need that gold key to finish the level. The angry reaction to this revelation ought not to be depicted. Instead, what you should have done was head left at that U-shaped passage, into a grid of red brick rooms. Later you're battling through grey stone passages and wood panelling rooms. The final battle comes in a great arena, surrounded by wood panelling, as SS and stormtroopers converge on the door you just emerged from. In one fell swoop, the episode just got interesting. Let's hope this continues...
Level 7

A mostly unremarkable level that holds some amazing secrets. You start out in a large spiral of jagged wood-lined passageways, working your way to the centre past infantrymen and SS to find a key, then fighting your way back to the start, taking the locked door and shooting your way to the elevator. A bit on the small side, wholly unremarkable, except for one thing. This is the level that hides the secret level elevator. And getting to it must be the hardest, most torturous process ever. At one point you should find yourself past the locked door, in a long rectangular hall with doorways on both sides. Go to the far right doorway and enter the room. There's a secret passage somewhere in here, which leads to a room full of ammo and treasure. In this room is another secret passage in the far corner, opening onto a square utterly filled with treasure. Further on, guarded by a group of SS, is a locked silver key door. You don't have a silver key. There isn't even one in the level. So push the wall to the left of the door, behind a wooden basket. A rectangular space, dark and wooden, is revealed. It ends in a thin wooden passage, reminiscent of underground liquor tunnels.
You enter the tunnels, and follow the twists and turns. And follow. And keep on following. As is later revealed when you take a look at this level with Mapedit, the greater portion of this level is taken up by this one passage, which twists through each of the four corners of the level. On its own it takes five minutes just to reach the other end, but there's worse to come. Several blind alleys have been thoughtfully included, one which is nearly as long as the main tunnel itself, and placed in such a way that you're compelled to take them, while the real path is hidden behind a blind turn. It is entirely possible to trek wearily around for fifteen minutes and arrive back in the treasure room, without ever reaching the end of the tunnel. Worse, it's possible to reach the end of the tunnel and not know it. There is no fanfare, no opening onto a massive quadrangle of health and ammo. No, the tunnel just widens from one block to two, and fetches up at a blind alley. When you reach this area, stop, and look for a secret wall on the left hand side. Pushing this aside, now you see a couple of clips of ammo, some health, and an extra life or two. Push one final secret door, and you'll reach the secret elevator. Sheesh. After all that, the secret level better be worthwhile.
Level 8
Your pulse is speeding up. Hitler is only one level away now. And having a large part of the level shaped as a swastika only reminds you of that fact. You start in a tiny room, no exits, pillars on the far wall. It takes precisely no brains at all to work out there's a secret door, straight ahead in fact. You press this, and now you're out in the swastika. Each of the arms, so to speak, of the swastika is worth investigating. For now, leave the one on your right to last. You should find a wormy red brick room down one arm, a segmented grey stone room full of white officers in another, and a small maze in the third. In this last is a silver key, which will come in handy later. That last arm I warned you to leave to last holds the most interesting rooms of all - indeed it's the gateway to the rest of the level. You'll find yourself fighting through barracks, shooting guards even as they jump out of bed, playing hide and seek in a maze of steel pillars with a group of stormtroopers, running along a hallway dotted left and right with doors that reminds you, in a most strange way, of college dormitories. Somewhere in all here, you'll find a gold key. Now it's off to those locked doors in the wood panelling walls. They lead to an indoor gym-hall-sized room, where blocks of red brick stand to attention. Around them, alongside them and lurking behind them stand Nazis of all stripes. They won't stand there for long, once they see you, and neither should you stay there like a dunce. Run, circling the room, taking the Nazis down one by one. There are two doors, side by side, on one wall. They open on a narrow passage, blocked most inconveniently by barrels, strewn left and right in pairs. Getting past requires good use of the strafe function. Sooner or later you'll be at the far side, at another set of locked doors. They're silver-key-locked, which is why you're grateful now for getting that silver key. Many a Wolfenstein gamer has been frustrated here by the stubborn it-won't-open noise. Go ahead. Open it. You were half expecting it. Six SS, three guards and three white officers see you and shout as one. You run back, shooting wildly, but the barrels stop your flight. Now the second door, the one you left alone, is opening, SS are pouring through, and you have to fire in two places at once. Machine gun fire streaks your body, reddening the screen. An alert, skilful gamer will survive this. Beyond he'll find another barrel-littered passage, and at the end an elevator. The Hitler elevator. Whatever happens, don't lose your concentration now.
Level 9
Tense, pounding music. A starting room full of ammo and a Gatling gun. It's time to go after the big guy. Open the door, and the first thought is ... it's him! The pulse in your wrist quickens, and you jam the thumb down on the CTRL key, Hitler finally in your sights. That said, there are a couple of nagging problems, such as: the lack of any feet and the way he seems to be floating above the floor. And when thirty rounds of from your Gatling gun finally destroy the bastard, the robe falls to the ground, empty, as a chilling laugh echoes in the empty air. Weird. It wasn't Hitler after all, just a Hitler Ghost. You deflate a little, and get some breath back. But not much, as you realise that this means Hitler is still out there somewhere, and the fire returns to your blood. Admit it. The first time you played E3M9, you were breathing quickly, sweating, hunched over the keyboard heedless of the outside world. The chance to kill Hitler - nothing before, or since, has come close to this kind of experience. Getting to him is an exercise in itself, and involves taking out two white SS, two infantry, and two more Hitler Ghosts (in the one passage!), or four if you feel up to it. Finally, you're at a locked steel door, holding the key in your shaking hand. You jam it in the door, hurl it open, and leap out. There's a challenging cry from somewhere in this huge area, perhaps from behind one of the steel panelled rooms. "Die, Allied Schweinhund!" You hear the clank of metallic feet, and then Hitler emerges.
He's in a full body suit of metal armour, with a chaingun in each hand, and he starts firing. You're already firing back, and running along the wall toward an alcove on the far side of the room. Your bullets are hitting the armour, denting it all over, but causing no damage to the man behind. The alcove contained health, ammo, and two white officers, who died before even being able to react. Struck by Hitler's bullets, you grab the health, patching yourself up, and all the while you can hear the clank of his metallic feet, coming closer, the sound of death. Your death. You leap back out, firing away. You're not wasting your bullets - this attack is concentrated on the shoulder and chest, trying to pierce through some vital part of the armour. Hitler is laughing. He seems to be toying with you. Then something snaps on his armour. The front chest plate falls forward, and then the entire piece collapses around him, leaving Hitler's body exposed. "Scheiße!" he curses, and stops laughing. You run for cover as Hitler fires once more, the blaze of fire from his chainguns reflected as a mad red glow in his glowering eyes. You're running around behind the steel plates, trying to flank Hitler. You catch a side shot of him, and fire off a short burst. You see something strike the shoulder, and then you're running past, hidden again. Bullets strike the steel plate you shelter behind, running for the next open space.
You're running out of room. The plates lead to a bare corner, which by now Hitler must have in his sights. Running out there would be like running to a straight death. So you double back. Emerging at a gap in the steel plates, you can see the open back of Hitler, only ten feet away and running. The Gatling gun is smoking in your hand, red fire erupting from the nozzles. You see bullets smacking home to Hitler, throwing up small splashes of blood in his back, like pebbles thrown into a pool. He turns slowly toward you, wreathed in a hail of gunfire, and there's an incredulous, unbelieving look on his face. His grip on the chainguns has loosened, and one falls to the ground. You stop firing. Hitler isn't looking at you. He seems to be looking upward, a sad, almost thoughtful expression on his face. "Eva, auf Wiedersehen," he whispers, his voice pitifully faint, but his throat cracks and the final word is cut brutally short. He twists his head a little to the left. You fire a single bullet into the hollow of his chin. It flips Hitler's head back, a gout of blood erupting from his mouth. Then everything just falls to pieces. Hitler is slowly tumbling to the ground. As he does so, blood is pouring out of his neck in a torrent, his mouth suspended in an eternal scream. The military clothes have been blown away, and the innards of his chest are hanging out, bloody and bare. He's haemorrhaging. Blood is coming from everywhere, from his legs, his horizontal arms, even spilling from his back onto the floor. For maybe half a second Hitler falls. It seems a lot longer. His body strikes the concrete floor, blood flung outward by the force of the collision, and a small wheeze escapes his lungs. His head rattles for a moment, then is still. You collapse to the ground, staring at his prone form. Death has finally come to the Führer. There are better designed levels, and more challenging levels. But this is the heart of Wolfenstein. This is what it's all about.
Level 10
It should have been obvious by now that Tom Hall, id level designer, was not striving for realism in his secret levels, but instead taking the opportunity to dress up some of his leftovers and generally weird out the player. In case this particular penny hadn't dropped, it will immediately after the player opens his eyes on this level, a symmetric maze full of Gatlings, ammo and treasure galore, and sees a huge yellow Pacman bearing down on him, its eyes rolling back and forth like a stupid videogame creature. You're not in Hitler's castle anymore. You're in an obscene parody of a pacman level, only this time the Pacmen (the Pacmen are the baddies, not the good guy - the good guy was originally called Lemon) are invincible. How closely the map mirrors the original arcade version can be seen by looking at the level in an editor - it's exactly the same, except for the wraparound exits which couldn't have been done in Wolfenstein and were converted to level exits instead. The walls are an appropriate blue, and those hairy Pacmen scarier than ever. Indeed this is something of a missed opportunity - as a secret level it's a pleasant diversion, but if there had been some powerup that allowed you attack and kill the Pacmen, the level could have turned into a very tense and frenetic affair. It would also be highly appropriate as a 3D makeover of Pacman and 3D Demon, (the original 3D makeover of Pacman, with wireframe graphics and 90 degree turns), given its position in a game itself a 3D makeover of an old 2D game. But sadly, no. You'll have to make do with avoiding the pacmen and collecting treasure (points). But hey now. People out there have the source code - how about a 3D Pacman game?
Episode 4: A Dark Secret
Level 1
Here is where the real career of B.J. begins. Not in his thrilling escape from Castle Wolfenstein, which, to be honest, was probably a picnic after he got through this prequel. No, this is where it all began. In a sodden castle on an assassination mission, trying to whack the head of the chemical warfare operation, Otto Giftmacher. Allied intelligence was good, and discreet. You're sure no-one has monitored your entrance to the castle. Now, stretching out before you in the tradition of all first levels, is a relatively easy, and short, walk in the park. I do mean relatively. The first level from episode 4 has a number of little tricks up its sleeve, most notably toward the end where you find yourself running through a red brick labyrinth, and the final battle to the elevator, which takes place in a large wooden grotto. It's also a little disconcerting that they're throwing all the bad guys at you from the start. SS, white officers, everything. At least those mutants are far off in the future...
Level 2
Oh my. Such an enticing and difficult level. The main feature here is the corridor, wide and square, which rings the entire level. Your main problem is to somehow fight your way into the centre, along these bluestone passages, past SS that are alarming in number, and infantry which seem capable of sneaking up from behind, clear from the other side of the level. It's a barracks level. There are plenty of small rooms with alert white officers and SS, but what really distinguishes this level is the number of secret passages around. Nineteen, all told, a number of them strung together in a narrow passage of red brick, leading you right through the heart of the level, to the other side where you are rewarded with a long line of treasure and extra lives, a line you were able to see from the outside and could never find the way in. I could tell you the way in, but it's too complicated to go into here. Get Mapedit.
Level 3
Just a thought. If B.J. knew he was going to be fighting through ten levels of utter mayhem, packed with soldiers and secret service police, why didn't he take more than a pistol and eight bullets? Eh? Couldn't he have been given the Gatling gun, or a few tripmines, or even a submachine gun? Oh well. That's just the kind of guy B.J. is. Brilliant, and utterly mad. You'll be feeling pretty mad after the end of this level, a level which springs a few surprises, as well as holding the (relatively) easy to get to secret exit. You'll be wondering at the insane ingenuity of the level designers, and their decision to throw you straight in the middle of a German dinner party, attended by important SS figures and many German dignitaries. Oh well. As the final body falls bleeding to the ground, it seems like a job well done. And as for getting to the secret level, when you reach the elevator, ignore its tempting doorway and instead take the winding passage on the right. Turn left, left again, right, and the secret doorway is somewhere around here. Good luck, pilgrim.
Level 4

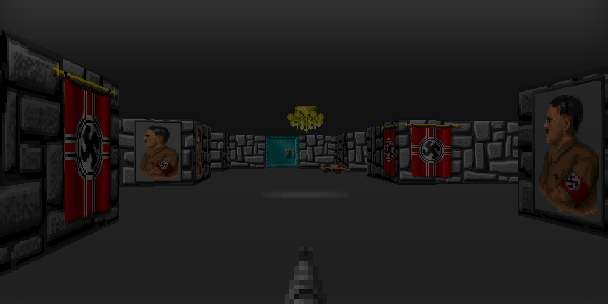
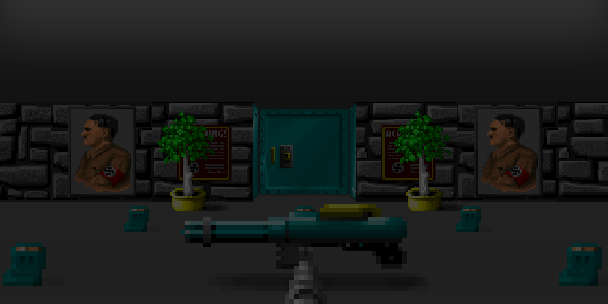
Shoot that guy. Immediately. In a few seconds he's going to open that door, and if you shoot him then, the whole level is going to know and come after your blood. Good on you. Now you make your way through this fairly easy level of good old Episode 1 fashioned wood. The par time is 1:00, and you should get well under that, once you know where the key and locked door is. That's the main challenge of this level. There aren't that many guards around (unless you're on IADI), and most of them are infantry anyway. Finding the key proves to be a little harder, however, when you're presented with 3X3 rooms that have eight exits. And then, once the SS is dead and the key is yours, you have to find the locked door it goes in. All up, though, it's not too challenging. The only really interesting part to this level comes after you've penetrated the first level of security and gotten through the locked door. You'll find yourself inside a huge grid of four N-S and E-W passages. And every wall in this grid is postered with a portrait of St. Hitler. Further, the grid is populated thickly (on IADI) with white officers, who will attack you from the sides, behind, all directions. Because you're in a grid, there are no dead ends you can hide in and take them out one by one - your backside is always vulnerable. And the elevator is hidden in here. Not on the outer walls: somewhere in, but not quite at, the middle. It's quite a good training ground for the secret level.
Level 5
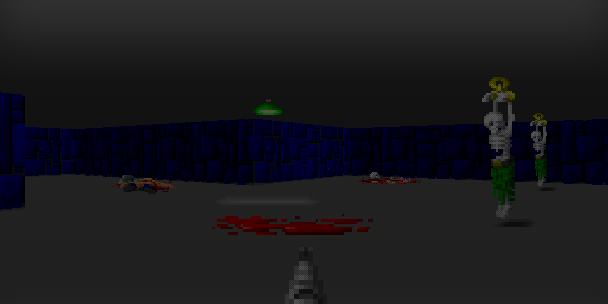
Things haven't been too grotty yet. You've been fighting through barracks, training grounds, even arthouse stores, and it's all been pretty clean. No prisoners, no chemical accidents gone awry, nothing of the sort. But as the elevator opens and you gape at the waste before you, you realise an altogether tougher challenge awaits. The chipped wood walls are bloodstained, there are dismembered skeletons on the floor. Stretching away in front of you, are eight alcoves where skeletons still wearing prison fatigues hanging from rusty bronze loops. And more bloodstained walls, and more skeletons. It smells rank, and disused. You walk to the end of the hall cautiously, and arouse the guard dogs. They run around the corner, charging toward you, but a few shots take them out fairly well. Then you run around the corner, gun at the ready. You soon realise this was a really bad idea. There are dozens of dogs still alive and running around in here, an area not wide and open but enclosed, segregated, mazelike. They're baying for your blood, and closing from all directions.
You pull out the knife, and run around, every second wall bloodstained, every second step crunching a dry skeleton underfoot, and stab forward, backward, and any time you feel the hot, fetid breath of a hound lunging for your throat. Finally, the floor is littered with dog carcasses bleeding red and black, and you see a tree and a pool of water on the far side. Over you go, and see there's a door leading out. You drink some of the water, and take the door out. It leads along a narrow, claustrophobic chipped wood passage, to two doors. The first, you quickly ascertain, leads to a smaller dog holding area, guarded by a now dead white officer and infantryman. Walking back toward the second door, you're struck by how quiet everything is. How still. How dead. The second door leads to a more open area, with barrels of slimy water and more dry skeletons. There's one area barred in by shiny green barrels, and here are a few white officers for you to kill. Now soon enough everything in here will be dead. That leaves three separate exits to try, and very soon you will begin to be struck by how violently serious this level is. The first exit leads to a small area with some white officers, and some decrepit kitchen equipment, mouldy barrels and discarded food bowls. (There's a secret door under the kitchen equipment - you can get the white officers' ammo with it). No worries, although the constant bloodstains and grey patches are getting a little off-putting. What sort of slaughter has been going on here?
The second exit leads to six different passages which lead to six different doors which open onto six different rooms and, in one case, connect to other rooms. This one is important. It leads to an area with a different wall texture (!), plain old Episode 1 wood, and two rooms slightly less decayed than the rest of the level. The first contains a wood fire, which explains why there are so many SS and white officers in here. Once they're dead, you'll notice the skeletons here are just a little... fresher, half mummified and still lying in congealed pools of blood. The second leads to what was once a prisoner holding area, with nine bamboo cages hanging from the ceiling, two still occupied by skeletons, and a tap and sink (for the use of the SS, two of which are still hanging around here). In lieu of any prisoners, this room has turned into the holding area for the blue key. Take it and head back. The third exit opens onto a huge passage which leads to an enormous maze, a multiply connected horror where the lights are spaced just a little too far apart, and everything's just a little too dark and mysterious. In this maze you'll find blood everywhere, a passage with eight doors leading away, and even a small room in the middle with a bed, a table set for two, a little light in the roof and a bloodstain on the wall. Of those eight doors, some lead to little dining rooms where SS sit down to eat, some lead to treasure, some to ammo, and some to an entirely different maze you have to get through, populated to the hilt with infantry. If you do make it through this maze, you're rewarded with more solidly constructed stone walls, trees, those imposing suits of Knight armour, and two exits that turn out to be fake. You're not getting out that easily - to escape you'll need to negotiate the stonewall maze, complete with skeletons on floor (but no blood, thankfully). And, needless to say, heaps of white officers/infantry. The maze contains pillars, redbrick walls, and some locked doors, which you can only open with the gold key, which is, much to your consternation, not in the stonewall maze.
You see, the gold key is not that easy to find. It's actually in the stonewall maze, sort of. Remember that door you took that led to the small room where you could see a Gatling gun, but it was behind the barrel and you couldn't get it? Well, you have to get in there, by pressing a secret wall which is way over at the start of the maze. And in here is the gold key. I never found that out until getting Mapedit. Now you can take on the locked doors. These take you to a few white officers, and some more locked doors, these locked with the blue key. If you didn't find it before, you'll have to traipse all the way back to the chipped wood mazes and find the bastard. Get through here and you find yourself in a room with heaps of white officers, a fake elevator exit, another fake elevator exit leading to another heap of white officers. and a real elevator exit. As a final insult, there should be a secret door here, leading to all sorts of extra lives and powerups (you really deserve it), but my version doesn't seem to have it. No one should be forced to run through a Wolfenstein level, frustrated, for hours on end. You'll end up feeling physically sick from the whirling motion. Still, these are the Nocturnal Missions, so we really should be warned.
Level 6

You'll think you're back in level 2. Same level-length corridors. Same bluestone texture. But no. This level, although similar, is also, well, quite different. The central feature of this level is a single passage, eight feet wide, that runs the full length of the level. From this passage, alcoves branch off every sixteen feet, like the teeth of a comb. In these alcoves there might be a statue, health, or a door. Behind the door might be more ammo, or more health, and almost certainly a white officer. Behind one door is a key, in another alcove there's a locked door. Before long you'll have put the two together, though it does take a lot of patience and skilful use of the strafe control. Through the door, you find yourself out of the bluestone prison area and into far warmer quarters, the wood panelled dining rooms and living quarters of the white officers and their soldiers. About nine of these rooms are linked together in a grid, and your mission is to fight through them all until you have the second key, which opens a pathway to the exit. All in all, a fairly forgettable level.
Level 7
It's red. Very red. And that's about all I have to say about this level, or at least the start of this level, except for a little tip - open a door, any door, but don't enter. Shoot. Watch the locked door, because the guards behind it hear you and will come chasing. Just shoot them and run through the door before it closes, because you won't need that particular key again in this level. Sure beats hunting through a series of secret doors for it. After that, just run through the hallway. Do not head left or right - one takes you to a room full of SS, the other to a maze full of soldiers and treasure that goes nowhere. Just run forward, into the grey stone area, and hunt around for the next key. Interestingly, you don't actually need to find this one either - the white officers behind the second locked door are more than happy to come running at any disturbance. This is a level that should be played at helter-skelter pace. It's all starting to seem a bit samey. Interestingly, Episode 4 doesn't seem to use many of the wall textures available in 60-level Wolfenstein. You'll have to wait for Episode 5 and 6, when everything starts getting art-deco on us. Oh, and this should be obvious by now, they're not getting any easier.
Level 8
The rising damp on the walls might remind you of Episode 2, but run forward a bit, and the white officers that start firing at you will soon remind you where you are. As a matter of fact, you're in a right tough level, which stacks challenges upon challenges on your plate. Its only blessing is that it is reasonably linear - once you've done a section of the level, you can forget about it. Mazes aren't really the order of the day, except at the start. What is the order of the day is repetition, just about every wall texture from the first three Episodes in the one hall, perfect hiding spots and sniping positions for the Germans, and twists and turns that are tricky and baffling without actually being complicated. Then you get halfway through the level, to a Y junction in a room of chipped wood, and suddenly everything changes. Suddenly you're in a maze of chipped wood segregated into two sections, and which changes seamlessly into a bluestone maze. Suddenly you have to find a key in a nondescript alcove somewhere in a maze half the size of the level, and hidden in a blind turn. Suddenly white officers are everywhere, on all sides, and there's no cover. Suddenly you miss the regularity of the first half of the level, as you fight for your life in a dim and dank maze that doesn't seem to have an exit. Be warned.
Level 9

Here, this first Boss level of the Nocturnal Missions, is where the real trouble starts. (Disregard that last level description) You might have got through the last few levels okay, but it's gonna take a couple of reloads here. Because Otto Giftmacher is well guarded, and he's not such a pushover himself. You can try, if you like, just running up to the bastard and starting to shoot. But this guy is tough, and takes a lot of bullets to down. More even, perhaps, than Hitler. You're almost certain to run out of ammo and be in need of some more. And the only ammo around is behind a locked door. So, come to think of it, is all the health. So from the start you head the other way, toward two keys. They're guarded somewhat incompetently by a guard standing with his back to you. This should be easy, you think. And so you kill him. Which is when the doors on his left all open at once and out comes an angry mob.
It's a trap. Twenty white officers and six SS were waiting for someone just like you to come along all lackadaisical and try to take the keys. Well now they've got you. If you survive this encounter, it's because you knew what was going to happen, or because you've got about 2 percent health left. An important question is - can you get the keys and not trigger the guys behind the doors? You can't kill the guard. They can even hear you knife him silently. No, all you can do is run up to him, snatch the keys, and run away before he manages to get a shot in. Then you can happily forget him and head toward Otto. Now: strategies. Learn how to use the ALT key. Wolfenstein has finicky keyboard controls (you can't change directions while running, for example, because it makes you start walking again), and sidestepping is a lot harder than in Doom, but you must learn it. A single missile from this guy can take out 90% of your health, a second one and you're dead. He's also pretty quick, and if you head into the ammo room or health room he'll come in behind you and block the doorway. So don't try the health room - just run for the ammo, and use your sidestepping ability to remain unharmed. Soon his heart will burst, and his fight is finally over. But yours is just beginning...
Level 10
Okay, I'm going to interrupt things here and take a poll. Won't be long. Now... How many of you have played this level? Quite a lot, I see. How many of you have reached it without cheating? Just a little less. Well, that's to be expected. Next question: How many of you have reached the level, without cheating, and without looking at the level in Mapedit first? That's strange - number of hands is getting smaller. Oh well. Now, out of all of you left, how many have been able to complete the level without God mode or the free items cheat? Hmmm. Not many. How many have done this on I Am Death Incarnate? What, three of you? Last question: how many have finished this level, at the hardest skill level, without cheating, and with only the pistol and eight bullets to their name? Liar. It's time for another secret level description. And this is surely one of the most infuriating secret levels ever. If id had included this in the regular file progression and made you complete it, there would have been blood in the streets. Image a grid, nay a mesh, as fine a mesh as is possible. One block wide passages, running the full width and length of the level, crisscrossing each other and single block intervals. Cut off the corners so the overall shape resembles a diamond.
Make every wall in the level the same texture. Put the elevator in - somewhere near, but not quite at, the centre, surrounded by hundreds of nondescript passages. Now populate your level, with something like sixty white officers. Only white officers. Nothing else. Give them all super-hearing, so they can hear you shooting from anywhere in the level and will instantly come running. Now release the player into this hellhole. Have fun.
Episode 5: Trail of the Madman
Level 1
If you thought Episode 4 had upped the ante in first shooter difficulty, think again. Episode 5 will be your toughest challenge yet. Of course, that doesn't prevent the first level from being the obligatory simple, small five minute job. However, this one's a little more interesting than that. Mainly because the extra textures for the nocturnal missions are finally being used. Here you are, in the heavily guarded fortress of Erlangen. You start in a room finished in blue plasterboard, with skulls etched on at periodic intervals. Head outside, take out the soldiers and SS (no faffing around with difficulty curves here), you'll see that the walls here are polished wood timbers, and are very pleasing to look at. They give a light and airy feeling to your surroundings, in comparison to the deathly grim prisons and army barracks you fought through in the last episode (and will have to fight through once you're finished here). In fact, this feels like a recently converted civilian operation. It's obvious that the chemical warfare operation is of great importance to the Germans. They're spending enormous amounts on it. But this is Nazi Germany, and every veneer has its underside. At first everything's fine, fighting through these clean, tidy rooms, snatching up treasure and liberating keys. But halfway through the level, everything changes. A door leads into a bare bluestone room, the floor covered in broken bones and metal chains. Two passages lead from this square, both constructed haphazardly from grey bricks, and along the floors of both are scattered skeletons, dry and husky, and, more mordantly, pools of blood. The destination is an army assembly room, with sentries stationed in alcoves on all sides. Killing them is a job in itself, as every move you make exposes you to fire from some side of the room. But finally, they're all dead, allowing you to grab the packaged meals lying helpfully on the floor, and taking the elevator up.
Level 2
(Is this common consensus, or am I the only one who thinks the PC speaker sound for the pistol is much better than the weedy SB sample?) Er, welcome to level 2. You start in another bloody grey stone room (I'm starting to get sick of that texture), three doors leading off. One of them is locked, so that gives you two options. But one of the remaining doors leads to a large red brick room, swarming with SS, who cut you down before you can run down to the other side. So only one option, really. Untrue. There's actually a passage right beside you, leading backward. The passage leads you to a couple of rooms where, in a narrow wooden alcove, you find a gold key. Off to the locked door, and now you find yourself running along steel plate walls, taking white officers and SS down for the count. And here's the exit elevator - that was short.
Level 3
Another short level, of the kind Episode 5 revels in - short, but tricky. The elevator is actually right behind you, but cut off by a silver key door. Better find that silver key. Your best bet is to run forward and left - but whirl around quickly and take care of those white officers, who have a nasty tendency to take you down from behind. The doors here lead to a large grey stone room, where SS, guards, white officers and, erm, dogs march the floor in a concentric square pattern. It's really quite a thing to watch, at least until they all notice you and break formation. If only the DOOM monsters had had the intelligence to walk about on their own...
Level 4
Symmetry. That words sums up, as good as any, this strangely memorable level. Describing it is a little tricky, but basically, imagine four red brick rooms, arranged on the corners of a large square. Now ring each room on all sides by a passage of grey stone. You've now got a slightly larger square. On the midpoints of the sides of this square, put four blue stone rooms - these connect the outer grey stone passages. And, of course, a grey brick room right at the centre, where you start. Seen from above, the level is like a giant chessboard, four rows by four columns. You've probably got no idea what I'm talking about. I could describe it from the view of the player - you're in a square room where four doors lead off to identical looking passages - or I could point out that each room and passage contains guard, a dog and an SS officer. Some contain white officers. Some have more than one guard, two SS, or even four dogs (especially the red brick rooms). And, of course, sections of the level are sealed off by locked doors. You'll need the gold and silver keys to get out of here. And some luck: there ain't much health around.
Level 5
Difficult, and bloody. From its strange beginnings Episode 5 is shaping up to be pretty tough. This level, certainly, is tough. It's also large, Episode 4 large. Starting in a rugged wood room, you'll have to be on your feet to take out the guards, arrayed around the elevator exit in the most inconvenient positions. Once they're dead, an embarrassment of doors (is that the correct collective noun?) are yours for the taking, two of them locked. And, as you might expect is the case, only one of the unlocked doors takes you somewhere essential. The others are there just to sap your energy. Two take you to a narrow wood room, holding SS and ammo. Another leads to a prison, square walls of blue stone, patrolled by SS, guards and white officers. You can't quite see why - the cells are either empty, or hold slumped skeletons, resting against the steel bars. A further door leads to a wide area, manned by SS, where wooden cages hang from the ceiling. Some of the cages are empty, and some hold forlorn skeletons. Bloody bones, and pools of bloods on the floor. Barrels, ammo, guards. Not a cheery sight.
The useful door, as mentioned earlier, leads to a convoluted area where dogs run in packs, plus a guard in a most awkward place (watch out). Kill the dogs, and any number of passages and doors present themselves for inspection. It's a maze, and yet it's not a maze. All the passages converge on just the one spot, a square room packed (and I do mean packed) with a crowd (is that the correct collective noun?) of SS, guards, dogs and white officers. You can't just stand there and fire into the mass, because there are passages all around and the Nazis have a tendency to take these passages, sneaking up behind you and shooting you dead. Kill em all, and the silver key is yours. Now it's head-back-to-the-start time, and off to the first locked door. It leads to a warren of winding stone passages, all interlocking. And by the way, the secret level entrance is here, on a secret door right at the end of the left wall. This secret door takes you to a large area, pillars supporting the roof, with treasure and health. A second secret door, on the far wall, is what actually opens up the elevator, along with that so-valuable treasure. But you don't really want to go to the Episode 5 secret level - it's a real let down. So just confine your search to the gold key, which shouldn't be too hard to find. What is hard is taking down all these SS - they have a tendency to group together, and SS in a group is bad news, as any Wolfenstein aficionado knows. Back to the start with the gold key. After all that, it's a slight letdown to see just a simple, winding red brick passage, leading straight without any preamble to the elevator. Easier than I thought...
Level 6
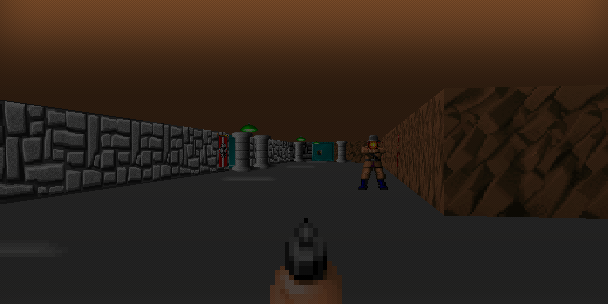
Here's your primer for E6M8 (a real bastard of a level). For some strange reason, it almost feels like you're outside to begin with. It's certainly not because of the mud brown ceiling. You're in a wide area of brown weave walls that almost completely surrounds a grey stone building. The 'almost completely' bit is because where the passage draws together on the far side of the building it's locked, by two gold key doors. You need to penetrate the building, and lift the gold key. What with all the Nazis around it could be difficult, but the entrance itself is no trouble - just a doorway that needs to be opened. Inside, a gaggle (yes, I'm having trouble with my collective nouns) of linked rooms, passages and even tunnels present themselves, some of them locked. The gold key itself is hidden in a room at the end of a thin, winding tunnel (its entrance can be easily overlooked), and it's well guarded. But a hard Wolfenstein Guru like yourself should have no trouble. Don't leave yet. Find the locked door first. Behind it you should find a small, well-guarded room holding the silver key. Kill, and collect. Now you can leave the building and try those locked doors round the back. They bring you to a narrow antechamber, where the far door is locked, silver key locked. (You're glad you got that silver key now, aren't you?) Behind is a long passage of red brick, SS running toward you. Take them out, one by one. And here's the elevator. Time to collect that treasure, and be on our way...
Level 7

Now this is insane. Everyone remembers this level, if not specifically. They certainly remember trying to get the gold key, when it's lying behind a whole row of SS, guards, and white officers, running as one toward you. They remember entering a blue stone area, where three passages run parallel to each other, seeing a guard in one passage and shooting him, then hearing a volley of shouts on all sides, and realising that guards, SS and white officers are pelting down the passages, flanking you, leaving no room for escape, and making the only option a helter-skelter pelt forward, to the room where SS and white officers guard food and a silver key. They certainly remember coming across a whole row of unlocked doors, seeing a guard in front of them, foolishly shooting him, then seeing each door open simultaneously and an SS soldier emerging through each and laying into your frail form with machine guns. And that final area, the long passage of those marbled wooden walls, SS flanking both sides... it's intense beyond belief. Get ready to be ambushed.
Level 8
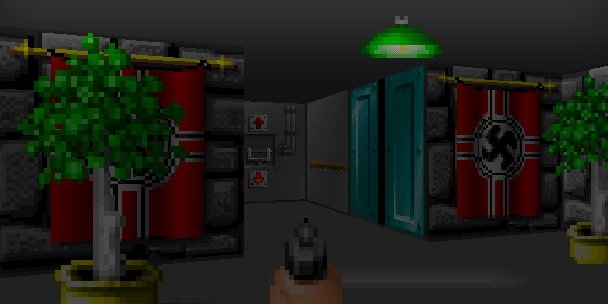
Mmmm... mazy. There are three main areas to this level. The largest, and also the area you start out in, is a twisting set of grey stone passages. Appended to this is are smaller mazes of red brick and blue stone, holding the gold key and silver key, respectively. This is one of those 'enforced maze' levels - the elevator is right at the start, but blocked off by barrels, so to get in you need the silver key, and to get the silver key you need the gold key, etc. It's difficult, especially given the propensity of these guards for surrounding you on all sides. The level seems to be helping them, rather than helping you. The only thing you can do is keep running. Use your speed to advantage, outrunning any guard who might have the drop on you, and shooting any guards you see before they have time to react. If you keep moving, they can't sneak up behind you. Finally it's back to the start, keys in hand. What awaits you on the ninth floor?
Level 9
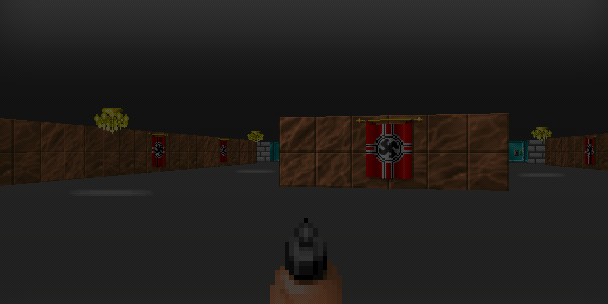
The home of Gretel Grosse. Yes, that's right, the sister of Hans Grosse, the two-chaingun weakling you haven't met yet. And the resemblance is uncanny. Greta looks a lot like Hans wearing breastplates and a braided blonde wig. Actually, considering his reappearance twice in the secret level of Episode 6, it's not such a farfetched idea. Anyway. Like her brother, Gretel is a real pushover. She's got no missile weaponry, just the two chainguns, so all you have to do is keep a long distance away, fire all the time, and eventually she'll topple over, inexplicably dropping a gold key at the same time. Which is where your troubles end, right? Wrong, as you discover when you open the locked door for the first time. Behind that bolted and barred door lies a large room swarming with SS, white officers and infantry. If you're not ready, you'll be dead in seconds. If you are ready, all you have to do is drop back out of sight, your gun trained on the doorway, and shoot them as they stupidly come through one at a time. Or, if you're not so cowardly, you can stand there like a man and shoot back into the crowd like Arnold Schwarznegger on PCP. One way or the other, you kill them. And then you round the corner and see a whole shelf of flags, maps, secret plans, chemical formulae, the blueprint for the chemical war. You run toward them, fist in the air, shouting. Now you know how to stop them. There's just one question. How do you get out now?
Level 10
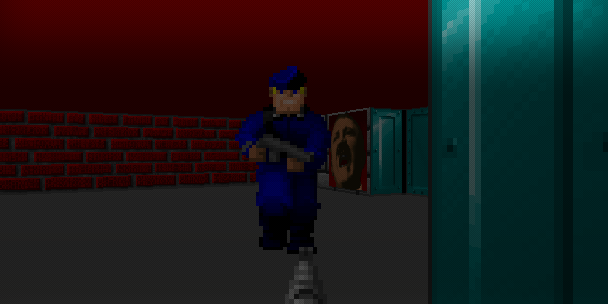
This is one of the more peculiar and, sorry to say it, pointless secret levels. Just a couple of bare rooms done in different styles - red brick, blue skull, grey stone etc, connected by some long and tedious passages with just a couple of enemies in them to stop you falling asleep from boredom, along with some treasure. Also you have to find a key of some kind which lets you reach the final room, somewhere I don't know where, with treasure and ammo in it. Forgettable.
Episode 6: Confrontation
Level 1
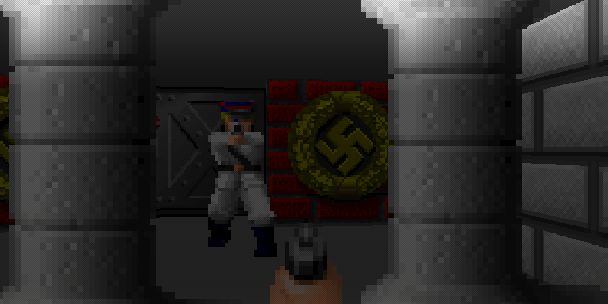
We've made it to the final episode, but if you think this is going to be some walk in the park, you better think again. It's clear right from the start that you're up against an almighty challenge. You start out in a old hangar. Several white officers are shooting at you from behind pillars, which makes aiming a little difficult. Eventually, you'll finish them off and take the right hand door. It shows you to an empty passage, with another door on the right. Open it, and out come five SS officers. You have to take them all on. With only a pistol. If you survive that, you can make your way to the far side of the passage and open the door. Now comes the really tricky bit. A passage extends straight in front of you. It's enormously long, and you can just make out a left hand turn at the end. At eight feet intervals along the passage are alcoves, on both sides. On IADI, each one holds a white officer. They have the jump on you. You can try running through the passage to the corner, turning around and laying waste to the hordes, but inevitably one of the guards will jump out and stop you. And you'll die. The only way to get through is to take things slowly. Very slowly. Inch forward, and wait for the cry of Spion! At that cry, run back and force the guard out into the open. Shoot him. Move forward another eight feet. If you're very lucky, you'll make it to the left hand corner (save here). This reveals another passage, even longer than the first, similarly dotted with alcoves. At the end of that is another left hand corner, which leads onto yet another long passageway. But you might make it to the end of all this, killing about eighty guards in the process.. If you do, the trouble isn't over yet. Now the passages widen, blue stone replaced by red brick, and start to wind a little. Needless to say, they're packed with infantrymen. And if you make it through all that, you'll finally find yourself in the alcove behind the pillars, at the very start of the level. What you wouldn't give for the 'no clipping' cheat to work in v1.4 right now...
Level 2
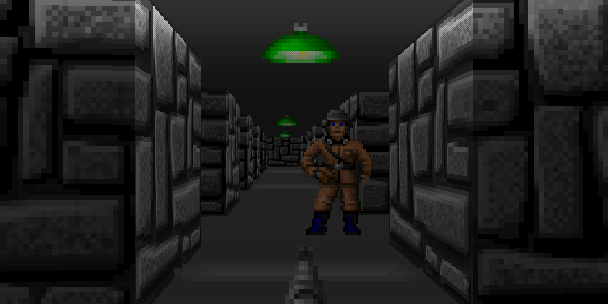
Level 2 continues the 'this is a Wolfenstein Episode for Real Men' feel with another challenging shootout. You start in a grey stone grotto, about eight by four, with guards in every alcove and behind every pillar. Fortunately they have a tendency to stay at their post even when there's a firefight ten feet away (very obedient lads) and will only attack if they actually see you. Hear no evil... Anyway, you'll make it through there if you made it through the level 1 gauntlet. There's a door at the far corner of the grotto, and to your dismay it leads to another, identical grotto. Only here the guards aren't nearly so stupid and come running if you so much as breathe. Fight your way through here (also to the far corner), and you'll find a nice wide, straight passage that soon intersects with another heading left-right. And it's huge. It stretches fully from one side of the level to the other, and what you'll soon find out is that this is the outer ring of one of those concentric mazes where you have to get to the centre and there are also sorts of blocks in the rings to artificially lengthen your path. Fortunately, this is a simply connected maze, so you can get through it by sticking to the one wall (it will take a while, though.)
A side note about mazes. We really should have discussed them earlier, as they are a great part of Wolfenstein's challenge. Because you don't have an automap, you have to remember map layouts, and the level designers know this, and consequently throw all sorts of mazes in your way. If you had trouble navigating your way through some of the other episodes, get your aspirin - Episode 4 had one mutha of a maze, and Episode 5 flirts a little more with the idea, but it's Episode 6 that takes the maze idea and makes it its own. Every level in Episode 6, bar the boss level and level 5, has a maze. The secret level has three. So a quick discussion of maze navigation is in order. To begin, there are two types of mazes - simply connected mazes and multiply connected mazes. A simply connected maze is one where every wall is connected to every other wall. There are no traffic islands or isolated areas. A multiply connected maze has traffic islands, or isolated areas, or to speak mathematically, not all its walls are contiguous. Getting through the two types of mazes requires two types of methods - one can be applied easily to Wolfenstein, the other can't. First, simply connected mazes. To get through a maze of this type, choose a side of the passage (the left wall or the right wall). Imagine placing your hand on this wall. Now go through the maze without lifting your hand. A little thought shows this method will always work in a simply connected maze, simply because all the walls are joined to each other. This can be done in Wolfenstein without much hassles, although you need to be careful going around corners. E3M7 (the secret level passage) is a good example.
Now, multiply connected mazes. Much harder. You need a virtual can of paint for this one. Start walking along the left side of the passage, say, and mark your passage with the paint. When you reach a junction, choose any path at random, marking your way with white paint. As you build up a trail of paint through the level, things get more complicated as you reach new junctions. If there's a passageway with paint on the left side, don't go in. If there's a passageway with paint on the right side, or no paint at all, go ahead. Never enter a passage with paint on both sides. This, surprisingly, will always work in a multiply connected maze. However, the need for paint makes it a little difficult to do in Wolfenstein - practically impossible, in fact, for anyone with less than superhuman memory. The only substitute, and it's a poor one, are the dead bodies of the Nazis you've killed. Dead bodies means you've been here before, but there are far too few to string together into a coherent path. Unfortunately there are a few multiply connected mazes later on in the Episode, so you'll just have to fly through these at random and try to remember which way you're facing (the TAB-F location cheat is very useful here.) Final note - there's actually a secret door on this first passage, on the wall closest to you, on the right, down near the end. It's near impossible to find without cheating, but it leads to a whole chain of secret rooms, secret doors, ammo, treasure, and guards (naturally). Try and find it.
Level 3
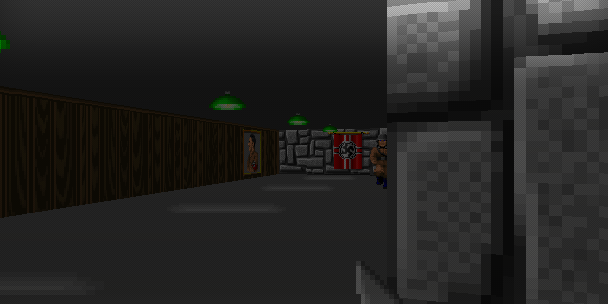
By now the constant use of Nazi symbols on the walls, signed portraits of Hitler etc have become taken for granted by the blase player. It's a great bit of scene setting, but we want more. Well, the Nazis weren't content with plastering their symbol in every available space, they're designing whole buildings around the concept. Most notably in this level, which features a whole cascade of Nazi crosses slotted together (Nazi bathroom tiles, anyone?) It's a subtle reminder on the theme of 'remaking the world in their own image', and just another way to bring the player even closer into the action. With the exception of maybe three rooms, all the passages in this level are part of one Nazi cross or another. One's built from wood, one from grey stone, one from red brick, etc. They all interlock, and finding the keys and getting out of here is a challenge. It's a maze, and yet it's not a maze. Fortunately, there are just a few less Nazis on this level after the insanity of the first two, particularly the first. Most players are relaxing a little, progressing through an Episode that looks like settling down from its fiery beginning into a nice little struggle, not too hard, just the right consistency. How wrong they are.
Level 4
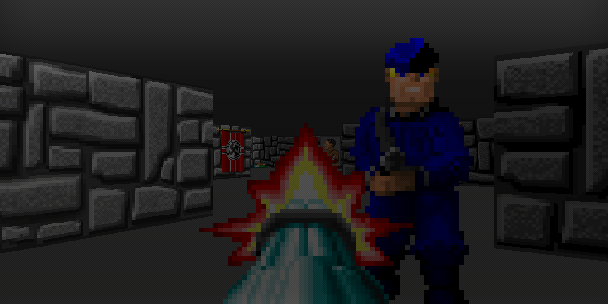
A bit of retro action for you - except for a few textures, this level could have come from Episode 3 or 1. All that grey stone. But things are a bit tougher than they look - particularly toward the end, where everything gets complicated and you enter 'where the hell am I now' mode. Mazing skills will come in handy here.
Level 5

Brutality and death - the atmosphere of Wolfenstein is relentless. This level keeps up the gory tradition. You start out in a familiar situation - a small passage with three doors, two locked. Naturally you take the unlocked door, which takes you to a grey stone room girded by stone pillars, and swarming with Nazis. Treasure litters the floor, and the gold key is there at the back. Get it (but don't forget to kill the Nazis). The first locked door is now yours for the taking. It leads to a depressing maze of chipped wooden walls. Alcoves complicate the corners, containing racks of wooden spears. Plus a couple of guards give you a bit of stick. You'd better run fast through this symmetrical maze, because all paths lead to an open concourse supported by stone columns and - needless to say - full of Nazis. They can hear you, from anywhere in the maze, and they're not reticent about investigating noise. Of course, amidst all the treasure, packaged meals, golden chandeliers and newly created blood pools, you find the silver key. Back to the start, and now for that final locked door. A narrow grey passage takes a hard left to a formidable room of grey stone and wood panelling, just the thing for aggressive white officers to hide behind and take pot shots at you. Plus the obligatory Hitler shots. Their constant repetition has become a bit numbing. By this stage you've seen it all. But you haven't. Eventually you come to three doors. Take the left and it leads you to a small room of blue stone, its floor awash with blood, broken bones, and the raw remains of crushed bodies. Their smell is all around you. What depravities has this room witnessed? There are two officers in here, and you shoot them instinctively. There's also a secret door, which leads to another small blue stone room, even deeper in blood.
Or you might go right. This leads to another small, blue room, with two more white officers. They stand on a floor sticky and rank with stale blood. All around them hang wooden cages. Some are empty, and some hold pale white skeletons, still feebly clutching the wooden bars with their thin bone fingers. It shouldn't be possible for skulls to have an expression, but these ones do - heads bowed, nose flattened, their posture speaks of despair and defeat. And amidst this carnage, the back wall holds a sink and a well of water, from which springs clear, fresh water. It's like the final insult. Water, that might have sustained these prisoners. Water, to clean away the death and the stench. Water: unused. It fills you with rage. The last door leads to a long, thin passage of grey brick, dotted every ten paces or so by crushed skeletons and giblets of flesh. You're forced to leap every single one. Who were these people? How did they arrive here? How long have they lain here, undisturbed? How long will they lie here, forgotten? Decades? Centuries? Nobody will ever know. Gradually, the passage widens and the bodies are left behind. Finally, it's just one wide, rectangular passage, interrupted at regular intervals by deep alcoves, on the left and right. You don't need to be Albert Einstein to work out there are guards hiding in those alcoves. So this is one section of the level you take very slowly, flushing the guards out one by one. Chandeliers hang from the ceiling, and potplants decorate the walls, but you haven't left the blood behind. In fact, two alcoves on the left wall hold secret passages, each leading to a single room of blood, treasure and ammo. So much blood. And watch out for the last room. And the elevator.
Level 6
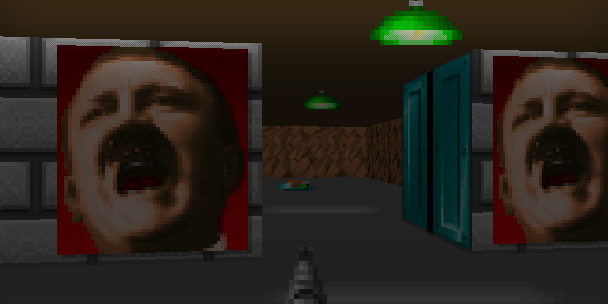
Oh my God what sheer and utter mazing agony. Take a look at the map in Mapedit and you will faint. You have to find your way through this...The only thing that helps is that various regions of the level are done in different textures, like redbrick, chipped wood and blue stone. You'll soon learn to recognise certain territory. Most important of all, you should associate certain textures with locked doors. There's a locked door in the chipped wood area - you'll need to remember this when you finally find a key and need somewhere to use it. The number of Nazi guards are increasing at a distressingly rapid rate. The keys are well guarded, as you'd expect, but there are also Nazis everywhere in the maze (ie the whole level) - white guards, SS, brown officers, even their faithful dogs. But no. Things can get a lot worse than this...
Level 7
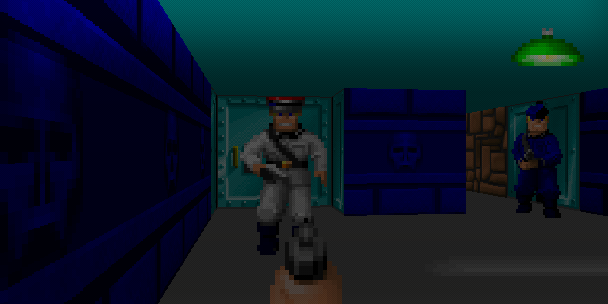
The thematic centrepiece of Episode 6, which might as well be termed Wolfenstein With Knobs On. This, with level 1, is where the Episode earns its fearful reputation. I have spent so long sweating through here that I'm not going to tell you the maze shortcut. You'll just have to suffer on your own. Mazes of purple slime, chipped wood panelling, and even, in the more remote parts of the level, mazes choked up with clinging green vines. Remoteness sums up the atmosphere of this level. Civilisation, normality, are just so distressingly distant from here.
Level 8
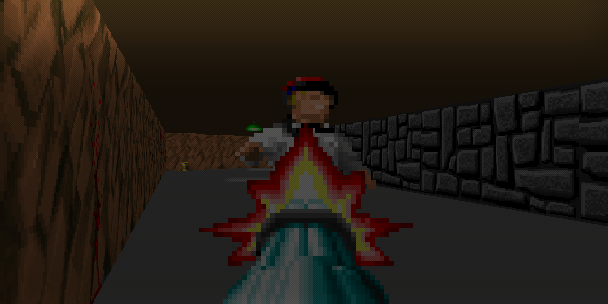
It just gets worse. There's so many people around here! It's like a city. The structure of the level is simple - a long wide passage, shaped like an S, curves from one corner of the floor to the other, splitting the level into two halves. Brown weave on one side, occasionally bloodstained, and grey stone on the other. You run along this passage for what seems like ages, shooting white officer after white officer. Finally, you come to a door on the right wall, leading in to the first half of the level. (And if you look at the level in a map editor, this door is almost exactly at the place where you started the level) This first half is chock full of grey stone rooms, interlocking like a honeycomb, and stuffed to the gillets with soldiers and treasure. Plus some blue stone and polished brown brick to keep you interested. You can forget about concentration camps for the time being. Your surrounds are well-lit, clean, and decorated everywhere by plants, eagles hanging on the walls, floor lamps and Hitler portraits. The atmosphere is almost like an army shopping centre. Eerie, and compelling. The gold key is in here, along with a surfeit of secret passages. Eventually you'll find it (after tracing a complicated, winding route that leads you through just about every room in the place - no dead ends here), and the only thing left to do is head back to the main passage and keep running. More white officers, more brown weave walls. For a while the wall on the left is brown marble, then it's back to grey stone again. On and on, killing and running, until you finally come to a locked door. In goes the gold key, and you're through. Into some rooms of red brick, which connect to rooms of blue stone, which lead to more rooms with grey stone walls, finally coming to a collection of rooms done in that brown marble style you saw earlier. Superficially, the interlocking rooms are a lot like the first half of the level, but the atmosphere in here is a lot different. There are a lot more enemies in here, and they're alert. The slightest sound brings them running. SS everywhere. Leons firing away. Blood in the potplants. It can't get any worse, can it?
Level 9
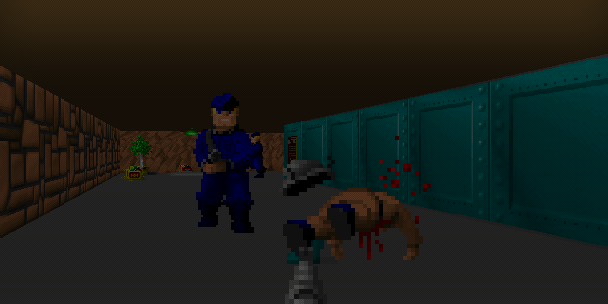
This is it. Your final challenge. I'm undecided as to whether this level, or the next level, or some other level in Episode 6 is the hardest in the game. You can take my advice that this one is pretty bleeding hard. Short historical footnote: some years back, when a current affairs show was doing a program on violent materials available on BBS's (most particularly the Terrorist's Handbook, which was something of an issue at the time), they showed someone playing Wolfenstein 3D, from the start of this level, with God mode on, and while the presenter talked about the damaging effects of violence, he was spraying the crowded rooms with lead. Why? It didn't really have anything to do with the "story" (you could put the same story to air today, only change "available on BBS's" to "available on the Internet", and add a little softcore porn to keep the viewer's attention), and anyway, isn't the violence in Wolfenstein a bit too heavy for a G rated timeslot? Anyway. Your challenge begins in a scratched wood entranceway, which widens to a wall in which four doors are set. There's a few guards and SS here in front of those doors, lying in wait to ambush you, but you should take care of them okay. There's also a secret passage on your right, on the bloodstained wall, which leads to ammo and health and which you will need to take. (Geek Boy on the program, who they got to play the game, took this passage as well). Then, perhaps, you will be ready to open one of the doors, and run immediately back. As in Episode 4's Boss level, the room beyond is packed to bursting with hostile Germans, who come swarming out like flies. Your Gatling gun is firing into the crowd, nonstop, and they're falling dead everywhere, but they keep coming. SS are getting clear shots and have you in their sights. White officers are blasting away. And you're stuck here at the back, nowhere to run, grimly blazing away, hoping beyond hope. (Tip: don't run to the start. Instead, run back to the secret passage and duck inside. It's only one block wide, and you can take out the Germans one by one as they try to enter.)
You might survive this first encounter, and there might be enough health back in the secret passage to bring you back to maximum. But unlike Episode 4, your troubles are just starting. You wander back into the rectangular room, from which so many German officers have poured. There are two exits - one on your right, one on your left. You take the right hand exit. It seems to open on a wide steel passage, empty. You head through and turn right, and immediately a volley of German cries rings out. SS, white officers, and infantry galore have been stationed here, and indeed on all passages leading toward General Fatface. You shoot the few you can immediately see, and now cries are coming from everywhere. From the passage in front of you, where it turns left and heads god knows where. And, sickeningly, from behind, from the passage you decided not to take, comes the sound of a door opening and feet, many feet, pounding through. You're surrounded. Trapped. Running forward, you find more Germans to shoot as you round the corner. There's an alcove here containing two white officer snipers - watch out for them. And more soldiers are pouring around the passage corner, besieging you from both sides. You keep running forward, keep shooting the soldiers as they appear, keep killing the white officers in a second alcove trap. And now shots come from behind you, so you turn and see eight officers firing at you, and you whip the Gatling gun around, drop to your knees and fire away... Waves of Germans crash upon you from both sides, and there's nowhere to stop and snipe. Finally, you duck into the alcove, over the two dead white officers, and take out each and every German as they appear. And maybe you'll survive this round too. If you do, there's probably about 4 clips of ammo in the Gatling gun, so run, or limp, back to the secret passage and refuel. Those alcoves with the white officers have secret passages, so try them too. And get your breath back, because the third challenge still awaits.
The two passages, left and right, will eventually converge on an open steel panelled space, somewhat like the entrance room you were in a while earlier. It narrows to a single, dark wooden passage, which abruptly turns right. The abrupt turn conceals a couple of officers, which you take out easily. A few more turns, a few more Germans, and suddenly the passage opens on a wide space. It's the final arena. Dotted with wooden boxes and all sorts of cover. Containing eight white officers, six SS, eight soldiers, a secret passage leading to ammo and health, and, of course, General Fettgesicht, with his twin machine guns and shoulder-mounted rocket launcher. Here the final battle will begin... and end. He's concealed from you at first, giving you time to take out the few visible Germans and a couple of foolhardy soldiers running toward the sound of a gunfight. Then he appears, and you're the one running for cover. That secret passage I was telling you about earlier? You can't open it without giving him a perfect shot at your back. So all you can do is run from cover to cover, keeping an ear out for any shouts of recognition from the other soldiers and shooting any as and when you see them. Finally, it's just you and him. Keep your finger on the strafe key, or you'll never be able to dodge the rockets. Maintain your distance. Keep cover as often as possible. And most important of all, never let the fat bastard out of your sights. It'll seem like forever. But very soon later, the final round will strike home to his rotten heart, and the fat guy shall fall senseless to the ground, his final word doomed to remain an enigma ("Roseknospe?"). You deserve a bit of congratulations, so be sure to read the endgame text, and experience the warm feeling of a job well done.
Level 10
The final Wolfenstein level. And boy does it go out with a bang (an interesting secret level!) Every enemy (excluding the Ghost Hitlers). And even a boss guy... You start in the centre of the map. It's been divided into four triangular regions, all of them torturous mazes and all of them chocked full of enemies. Directly in front of you, the walls are yellow and grimy. It's musty in here, and the passages are choked thick with vines, reaching green roots down from the cracked, damp ceiling. Fetid water drips into pools of vomit and blood. Appropriately, this long disused area of the level has been claimed by the mutants, who do their level best to kill all interlopers. If you manage to hack past them and to the far end of this area (it's very difficult, trust me), the rewards are plenty and include the Gatling gun, extra lives, ammo and treasure. But not much health. There's very little health in this level. And you need every bit you can find. The search pays off in more ways than one - if you press enough secret doors you'll find ammo, extra lives, and even a red Pacman (!) somewhere in there. Eventually you'll realise the map doesn't go anywhere, and return to the start, where you take the time to notice that there's a gold key locked door here. Obviously, you should be searching for the key. You decide on taking the area directly opposite the one you've just been in, and soon find a maze of wood tunnels. Your first shot brings out a volley of answering cries from the stationed brown guards, and you run fearfully through the tunnels.
And find, to your surprise, that all the tunnels converge on a single hall. The surprise is soon taken over by an even bigger surprise. Hans Grosse is here, or possibly his twin brother, and immediately he starts firing rounds into your frail form. You fire back, aware that even now infantry guards are appearing at tunnel mouths all around you, converging toward the firefight... You might survive. If you do, grab that extra life because you need the health. Desperately. Now, killing Hans Grosse has given you access to the gold key. From here, you could quite easily run back to the central hub, take the door to the elevator, and exit happily. But one half of the map remains to be discovered, and remember, this is a secret level. You're supposed to find everything in here. So it's back to the start. Again. On the far side of the elevator area is a wall of wood panelling. A door leads to a room of those thin beige wood panels, and from here you can take any of six paths. All of them are a different entry to the maze beyond, and all of them are chocked full of SS, infantry and white officers. You'll have to keep running, because if you don't they'll be on your behind and attacking you from both directions. Also, the health and extra lives are all hidden behind secret doors, as well. At least there's no vines obscuring your view. It's a mixed blessing, because lurking in here is another Hans Grosse, the third triplet. You have to take him on in a room not much larger than a bedroom, while infantry choke the passageways all around you. Not easy.
Killing him just gives you the gold key. Which you've got. So you go back to the start, and wander south. Everything is a lot more spacious, and with the glossy polished wood panelling, looks a lot cleaner. There are a few SS and white officers in the first room you encounter, but nothing too serious. The next door opens on a wide hallway, which runs left and right, curving backward. You can go either way, killing the few white officers you see, but you soon realise that the halls are bending back toward each other, like a huge circle. You wonder what's at the centre. Soon, you find out. The largest crowd of enemies you've ever seen. SS, white officers, dogs, mutants, infantrymen, and behind all of them at the back, Hans Grosse again. Mother Grosse must have sired Quadruplets... or worse. They're all running straight for you. Better start firing. And finally, they're all dead. Every last one. You run to the back, grab the health and ammo, and return to the elevator, bloodstained but feeling higher than you've ever felt before...Great music, too.